Visit our website!

Sunday, March 5, 2017

Tip of the Week: First Part of Awkward Pose


Tips to Consider for the first part of Awkward Pose:

1. Especially with newer students, the shoulders tend to lift and shrug upwards in the pose. Make sure your shoulders are DOWN away from your ears with your arms stretching forward.

2. Oftentimes students will lift their chin up when the teacher says to do backward bending. So rather than lifting your chin up, keep your chin level and think "Upper body up". You want to use your back muscles instead of your neck muscles.

3. Keep your stomach sucked in with the abs engaged the entire time!

4. Sit down until your hips touch the invisible chair. Most beginners don’t sit down low enough because they feel funny sticking their buttocks out behind them. It will feel very strange the first time you sit down all the way but it will help to increase flexibility in your hips. Sit too low, and you cannot lift your chest up and bring your upper body back, so that your total spine is backward bending. You basically want your upper legs to be parallel with the floor.

5. To go deeper in the posture you aren’t trying to sit lower. You are trying to lean back and fall down backwards.

Click "here" for more information on the first part of Awkward Pose.

Saturday, February 25, 2017

Tip of the Week: The Lift in Locust Pose Isn't All About the Legs


Although you might think Locust Pose (Salabhasana) is all about focusing on the strength of your legs to raise them up high, the key to this posture is to focus on maintaining a strong upper body, a "pushing grip" with the pads of your fingers and palms of your hands, and learning to shift your body weight to the front.

Make sure you have a good set up. Lying on your stomach, roll your arms under your body with your hands and palms facing the floor. Try to get your elbows completely under your stomach so that they are invisible, and have your baby fingers touching side by side. This is the only posture where you are told to separate your fingers, so really stretch them out wide and grab the floor with your fingertips.

Use the strength in your hands and arms to maintain your weight towards the front of your body, so you can hold your legs up for as long as you can.

Bring your focus to activating the muscles of your back and truly feeling the strengthening sensation of the posture. This will help you to activate the muscles more and often will help you achieve more height.

Keep your arms and legs active, engaging your muscles and keeping them straight. The tighter they are the lighter they will feel. From Bikram educator Craig Villani, "Do not bend your knees in the posture because you are breaking the static arc of the posture."

Another important key to this posture is focusing on reaching your leg back away from your body, more than trying to lift it as high as possible. According to Bikram, "In all three phases of Locust, reaching and stretching your legs out, away from your body, is the important thing, not how high you lift them. (And, as always, your knees must be locked.) Imagine that someone has hooked your big toe to one of my Bentleys and I'm driving it through the wall behind you.

In the last, most hated part of Locust--lifting both legs at once-- understand that you're not really doing this with the legs on their own. When you can accomplish this lift, it will be because the muscles of the lower back and abdomen are doing the work; they're picking up the legs and moving them. So if you're struggling here, send mental message to those areas, and to your lower spine, telling them to send more power right away!"

Thursday, February 16, 2017

Tip of the Week: The Holy Grail of Bikram Yoga is "Opening"

We all know Indiana Jones and his quest for the Holy Grail. Methodical and tenacious in his search. As one adventure ends, he doesn't reach for his pipe and slippers; he's back on his hunt for the next elusive artifact.

In Bikram yoga, the Holy Grail is "Opening."

Hatha Yoga is all about the mindful application of strength, engaging the musculoskeletal system in such a way that the joints are gently prised open, to improve joint articulation and promote the intake of fluids, oxygen, and nutrients.

When practicing Bikram yoga, your primary focus should be on seeking out and hunting down where you can create more space in the joints.  Once you've found it, use strength to maximize it. How far you can visibly go into a posture is not that important. What is important is how much you feel the sensation of the body being pulled open as you perform the various postures.    

If you're thinking about depth, your are no longer keeping your mind's eye on opening up the body.  If you're not opening, you are collapsing. Maybe only by a small amount but that small amount, over time, hinders your development.

The benefits

1) Better alignment
2) Improved muscular control
3) Greater muscle stretching
4) Increased flexibility
5) Stops nasty twinges in the joints due to over compression
6) Greater internal massaging of the internal organs  
7) Greater clarity and stillness of the mind


As an example take Half Moon Backbend.  If you concentrate on going back as much as you can in this posture, you will most likely over compress the intervertebral discs in your lower spine. By focusing on expanding & opening the whole of your front side, you'll never get that nasty twinge in your lower spine. See Backbends as a front side opening posture, so don't place your mind behind you, keep your mind in front. Focus on opening up the whole front side, lifting up, opening the chest like a flower blooming in the sun. Pushing hips forward to increase the opening of the hips & lower torso. When you get the hang of it, you'll end up going back further without pinching into the lower spine.

Just like Indi once you've found what you've been searching for, you keep looking for more. So in Half Moon Backbend once you have found the opening in the chest and hips, keep searching for more space in other joints. Try creating space in the neck by gently lifting the neck up to feel the throat pulled open. Then contract the thighs to create space in the knee joints. Be tenacious in your quest for creating space.


The opposite of backbends are postures where you're opening up the back of your body, such as Standing Separate Leg Forehead to Knee Pose.  Here focus your mind behind you; Chin in, throat choked, to feel the back of your neck pulled open.  As you round down to get the forehead on the knee, suck in the stomach in such a way to internally push the spine back & up, helping to arch open the back of the spine. Stretch the hip of the front leg back & up, to feel the leg /hip socket pulled open; this helps keep the hips square and enables the leg to straighten without that nasty compression when pushed straight.

So next time you're in the hot room, imagine you're Indiana Jones searching for the Holy Grail - "OPENING".  In all postures, your goal is to seek, locate and mindfully pull open the joints, creating space within them.  Which means, you don't care how far you have gone into a posture.  You care only about how much you are pulling the body open. Once you get the hang of it, you end up going into postures deeper than you have before but with less strain and a significantly enhanced mind to body connection.

Bill Thwaites
From  Sohot Bikram Yoga

“Yoga is 99 percent practice and one percent theory.” - Yoga Guru Pattabhi Jois

Monday, January 30, 2017

Tip of the Week: Squeeze Arms into Body During Cobra


In class tonight Elizabeth had a tip for Cobra Pose (Bhujangasana). She said that one of the biggest things she sees students doing incorrectly during this posture is placing the arms too far away from the sides of the body.

If your hands are too far away from your body, you’ll likely end up jamming your shoulders toward your ears—a Bhujangasana no-no. Before lifting, your hands should be right next to your chest and directly under your shoulders—thumbs in line with your nipples. Your upper and lower arm should create an "L" shape at 90 degrees.

You'll naturally want to splay your elbows out to the side, so you need to consciously hug your upper arms and elbows as tightly as possible to the sides of your body. At the same time, pull your elbows back towards your feet, drop your shoulders away from your ears and press your shoulder blades forward into your chest.

By having the proper arm alignment, you'll be able to create more space in your spine by lengthening it, and use the strength of your upper-back muscles instead of your arm muscles.


Sunday, January 22, 2017

Tip of the Week: Inspirational Story of Mind Body Soul Connection


Jenny McKane started practicing at Bikram Yoga SLC in January 2011. I practiced next to her today and she gave me permission to share her story. She is so strong and graceful in her practice.  Her mind body soul connection is strong. Such a positive inspiration to all that know her story. We never know why people practice at Bikram Yoga SLC.  But once I know their story, it is a testimony to me of the why students keep coming and practicing.  We have the best students in the world.  I appreciate all that come and practice even if I do not why they come.    ~Greg


It was 2013 and I was 37 years old when I found myself in the emergency room in the middle of the night with severe abdominal pain. The pain was caused by a cancerous tumor in my colon that had grown to the point of rupturing through the colon wall and spreading cancer cells all throughout my abdominal cavity and into my lymph and circulatory systems. At that point, statistics showed that I had a 3% chance of being alive 5 years hence. Enduring a six-month round of chemotherapy was said to increase those chances of survival to 22%. So after two separate surgeries, I decided to endure the chemo, crossed my fingers and started the balancing act on that thin line that divides positivity, hope, & the belief in miracles from depression, despair, fear, and acceptance of death. The latter had more gravity so, unfortunately, I tended to lean in that direction.
 

Two years later, hoping I might actually be in the clear, but still believing otherwise, I began experiencing more pain. What the doctors and I were hoping was just a ruptured ovarian cyst turned out to, in fact, be the cancer. It had metastasized. By the time I got into surgery, my right ovary had transformed into a tumor the size of a grapefruit. Neither I nor my doctor could find statistics to show whether or not more chemo increased my chances of survival at that point, presumably because all of the statistical data (i.e. the patients) were dead. But I wasn't ready to say goodbye to my kids yet, so I told myself I could keep the core of my body alive while the chemotherapy tried to kill every other part of it.
 

But this time something was different. I was different. I was tired of reading medical journals and case studies and begging for non-indicated methods of treatment and arguing with ignorant doctors and, most of all, being pumped full of toxic chemicals that were destroying my internal organs and making me feel inhuman. Four and a half months into the second six-month chemo regimen, I made the very difficult decision to quit. It might have been the wrong decision but it just felt like the right thing to do. So I flipped it a big ol' middle finger, informed my oncologist of my decision, and I haven't looked back.
 

I can't pinpoint exactly what was different the second time. It could have been the books I was reading, the people I was talking to, unadulterated desperation, or, perhaps even cosmic intervention, but pretty soon I found myself drawn exclusively toward Eastern Medicine and ancient health and healing methods, including yoga.
 

My body thanked me for quitting chemo and I vowed to REALLY listen to my body from that day forward... to care for it to the best of my ability. And, you know, it was very hard to love and care for a body that didn't even seem like my own. I was a scrawny, emaciated, pale, hairless, weak, torpid figure covered in scars and filled with adhesions. I had very little energy to work with so I started out slowly and carefully by simply laying on my back on the floor every night and sensing tension and pain in different areas of my body. And then I would stretch and move in such a way as to address these areas. I was surprised at how instinctive it became and by how amazingly good it felt. Before I knew it, I was moving in a way that looked an awful lot like yoga! And I was completely convinced that something I had read somewhere not long ago was true: that these human bodies we inhabit do, indeed, have the ability to heal themselves if given the opportunity.
 

Fast-forward several months and here I am: strong, healthy, fit, and more mentally sound than I've ever been. Yoga has reconnected my body and my mind. For the first time in 3 years, I have a genuine, whole-hearted belief that I'm actually going to beat the odds and live much longer than expected.
 

I owe my current state of health, in part, to eating a very healthy and almost entirely plant-based diet void of dairy, sugar, and other substances that are believed to promote tumor growth. I owe it, in part, to opening up my heart not only to my support network of family and friends, but also connecting to humanity as a whole... expanding my awareness beyond what I can physically perceive. I owe it, in part, to letting go of every aspect of negativity that once seemed to have a choke-hold on my mentality. I owe it, in part, to learning to laugh and have fun and to keep a sense of humor in the face of difficulty. I owe it to meditation.
 

All of these things go hand-in-hand with yoga. The more I practice yoga, the more awareness I gain, the more healthily I want to eat, the easier it is to remain positive, the more connected I feel to everything around me, the less stress I feel, the more slowly and deeply I breathe. If done properly, yoga *is* meditation.
 

I currently practice 3 different styles of yoga including Bikram. Even the beginner-level Bikram class is decidedly advanced for a person whose body has recently undergone multiple surgeries and chemotherapy and who has significant muscle atrophy. I don't know that I would recommend it to someone who has no prior yoga experience.
 

But there are two things that Bikram has done for me that the other yoga practices have not: First, it has sped up the rate at which my body has been able to rid itself of the chemotherapy and radiation chemicals that would otherwise remain in my system indefinitely. The compression postures increase circulation of both blood and lymph and the complimentary sweating helps to flush the tissues. Secondly, the spine-strengthening series has helped me to regain back strength like no other yoga class has done thus far. I once spent 28 straight days laying in a hospital bed in an inclined position. As a result, my front body was chronically contracted and my back body stretched. Bikram yoga helped me to identify this imbalance and helps to correct it.
 

I constantly promote yoga to whomever will listen to me passionately rave about it. It has transformed my body and my mind. It has transformed my life. It enhances my feelings of strength and willpower and the concentration and focus it requires makes me feel like I can confidently and fearlessly take on the world. I wish it didn't take such a difficult turn of events for me to come to this discovery and realization, but I'm exceedingly glad I am where I am right now. Already, my passionate promotion of yoga has encouraged several people to take up their own practices. My hope is that yoga will help them to keep their minds, bodies, and breath connected such that a continuous natural healing process offers them full health and the ability to avoid cancer and any other of today's rampant and prevalent health conditions. Yoga for life!

Saturday, January 14, 2017

Tip of the Week: Shoulders in Spine Strengthening


The spine strengthening series has always been challenging for me. Instead of isolating the muscles of my back I have been cheating — using my leg strength, especially in Locust Pose. But the other day, I had a bit of a breakthrough. I finally heard the words of the dialogue that talked about shifting your weight forward. The teacher must have elaborated on this theme or maybe I just finally heard it, but something clicked. I was able to isolate and use my back muscles. Boy, did that feel different.

As the teacher explained, the key to Locust Post — all three parts — is in the shoulders. Pushing your shoulders onto the mat and using your hands to create leverage against the floor forces you to use the muscles of your back. This is challenging for me, because my shoulders and chest are very tight. I need to really shift my weight forward to get my shoulders to touch. But when I move slowly into the posture, I can do it.
It is important to shift the weight forward and press your shoulders and hands down BEFORE you lift your legs — otherwise the leg muscles will take over. My legs do not reach nearly the same height as they did during my “cheating” days, but I feel the benefits are greater. I am excited for this breakthrough.

I also discovered that the position of the shoulders is important for the other spine strengthening postures. In Cobra Pose, the shoulders must stay down to activate the lower back muscles and the proper back bend. In Full Locust, they must stay level with the arms elevated, even as the shoulder blades remain relaxed and down, once again activating the muscles of the back. And in Bow Pose, the key is to relax the shoulders, letting them be guided back by the strength of the kick. In all cases, focusing on the proper placement of the shoulders forces the back muscles to do the work. It is harder, but the result is better.

This got me thinking about my shoulders in general. Keeping the shoulders back and down is a common refrain in almost every posture — even Savasana! I realized I have been ignoring my shoulder position throughout class, letting my stronger leg muscles and core bail me out in several postures. In fact, my most common correction in the standing series is to lower my shoulders away from my ears.

I am making my shoulders a focus of my practice for the next several months. Back and down will be my mantra. Let’s hope my spine will emerge happier and more supportive of a happy life!

~ From hotoffthemat.com

Wednesday, January 4, 2017

Tip of the Week: 4 Secrets to Survive Your Most Awkward Pose


The following from Zefea Samson on evolationyoga.com lets us in on some secrets for surviving Awkward Pose. These tips could also be taken to heart for other postures we find uncomfortable or awkward in our practice.

4 secrets to survive your most awkward pose


I am infamous for holding postures longer than most of my colleagues. I have certainly heard students complain that I hold awkward posture too long. Heck, I want to complain when other teachers hold the pose more than my legs appreciate!

A friend and long time teacher once said during a workshop: “I believe you shouldn’t trust any teacher who won’t hold this posture long enough, as it tells you everything about their own practice. Awkward pose is indeed an uncomfortable pose for most of us, but the teacher, as well as you as a practitioner, should know that it is a safe posture that physically and, most importantly, mentally prepares you for the rest of class. It’s a shame to get shortened on that, so be happy with a teacher who holds this posture a bit longer.”
Well, that’s nice, you might think, but knowing this won’t be enough to maintain a pose that feels so strenuous, for an extended amount of time. So here are some tips from that annoying long-posture-holding teacher, to survive awkward pose, or any other pose for that matter, that feels the most awkward in your practice.

1. right intention & focus

We all have those days, that the moment class starts you feel that your body is just not up for it. For whatever reason you feel stiff and tight and maybe even sore. Muscles that you didn’t know existed start talking to you. You are pretty certain that they are telling you to not do the posture, just leave the room and instead go enjoy your favorite comfort drink in the coffee shop next door. And if it isn’t your body, than it will be your monkey mind telling you that it wasn’t the best day to come in because you are tired, you ate too much, you have too much work to do or just because it’s too rainy or too sunny outside. But hey, you are already there, so you might as well make up your mind to feel different and figure out what it is that will make you enjoy the experience.

Often teachers suggest at the beginning of class to set an intention. Before you start moving around, take this moment to identify with the focus you will need to approach your practice this time, what body part needs some extra attention, what thoughts you need to let go of. With every posture you have an opportunity to start over again and to recheck if you are still connected to these objectives. You can also start every next posture with an intention for that specific pose. If you always tend to come out of awkward pose before it’s over, you can make an extra determination to not give up, to listen to the teacher’s voice instead of the one in your own head. If nothing else works, you could even bribe yourself with the reward of that comfort drink after class, only if you comply with your own goals.
 
You’ll be amazed by how quickly your mind will get strong this way. And this will benefit you not only to execute a specific asana, but with all other aspects of your life. For me one of the most amazing effects of practicing yoga was to realize that I can do anything if I just set my mind to do it!

2. correct form

Depth in a posture is only relative to correct form. By practicing the correct form you will gain deeper depth. I am often personally guilty of this. I bypass some essentials, just because they don’t feel so good, to get to a certain end result. Just because I was able to reach a certain depth last time, doesn’t mean it needs to happen today. 

How do you know what the correct form is? Listen to the teacher. He or she is there exactly for that, to let you know what steps are essential and what the results are. I find it very important to listen to the teacher each time as if it is the first time I am practicing. It doesn’t matter in that sense if it’s an entirely new practice or the familiar 26+2 series. In some traditions and some classes it’s encouraged to follow your own intuition, but I find it important to let the teacher lead me. Otherwise I could just do my own home practice, right?

   
Different traditions give different variations of similar postures. Utkatasana, which I have learned as awkward pose, is called chair pose elsewhere. In a flow class you might practice it with your arms stretched up instead of forward. Not one way is better than another, it’s simply that different approaches have different benefits. And this of course requires a different correct form. If you practice the way you believe is correct instead of listening to the instructions in the moment, you will most likely miss out on a lot of new information, understanding and depth in your practice.

3. breath

In most activities that we do, our breath follows our movements. It seems to be something that we have only little control over, if at all. I recently watched a whole bunch of runners jogging by our house for a marathon. Most of them were panting, huffing and puffing; their mouths open in their red faces. They were focused on their pace and maybe their steps, but their breath was trailing. It didn’t seem that they were conscious of their breath. In yoga, ideally, it is the other way around. Your movement follows your breath. That is why many teachers will precede most instructions with a breathing cue: “Inhale, arms up, exhale bend forward.”

In a fast paced class, when postures are held longer or when you practice in a heated room, it will feel very daunting to focus on your breath while you are also trying to stand on one leg or bend your spine in different directions. This is why most classes will start with a specific breathing exercise that not only will warm you up, but also help you tune in to this essential force of life. Sometimes the teacher will suggest a special way to breathe in a posture. When there are no specific cues given, just be conscious of your breath and notice how you are breathing. When, after just a few seconds in awkward pose your legs start to shake and your arms begin to shiver, instead of panicking and coming out, check what your breath is doing. Are you holding your breath when things get tough? Never a good idea! Are you breathing through your mouth? See if you can shift it to your nose, this will give you more control. Is the pace fast and shallow, try to extend each inhale and exhale. Notice how this will help to keep your heart rate slow and steady. When this become your primary focus, the posture will be over before you know it.

4. stillness

All asana practice includes savasana at some point. Most classes will end with this posture where you do nothing, be completely still and let the benefits of the practice sink in. The faster you can find that place of stillness by letting go of your thoughts and tuning in with your breath, the quicker you will feel refreshed and reenergized. Once you get accustomed to this process you can apply it anywhere at any time with whatever you do.
Once you advance in your practice, it is important to start finding this place of stillness not just in your savasana, but with everything you do. First find complete stillness in between the poses. If it seems that you only have a few seconds in a fast paced class, you will find more time and space if you are still in between. Really still. No fidgeting with your hair. No water drinking. No adjusting of your outfit. No anxious looks around the room.
Just. Be. Still.

And then, once this is no extra effort anymore and it starts to feel like a normal thing to do, find the same stillness in each and every pose. This might seem odd when you are stretching, kicking, and contracting. The trick is to know where to be active and where not. There is always something that you can let go of. You might often hear teachers telling you to smile and that maybe seems unauthentic. What it is, however, is an encouragement to let go of some tension. Maybe its in your neck and shoulders, maybe in your face.
I recently saw an old picture of me in awkward pose, and oh, did my face look awkward! When you are able to let go of tension somewhere while at the same time you consciously contract and stretch specific body parts, you will feel everything open up! This way you create space and stillness within the pose, within yourself. Now you are truly practicing yoga!

Well there you have it, my four secrets for surviving awkward pose and an entire challenging yoga class. Don’t get me wrong, it’s not easy. After practicing hot yoga for about 10 years I’m still working on all of this in every single class. But take my word, focusing on these four aspects will bring your practice and your life to a whole new level. Of course there is much more to work on, like having compassion for yourself and acceptance.

Thursday, December 22, 2016

Tip of the Week: Look in the Mirror


Here are the reasons why the mirror in Bikram yoga is crucial:

1. The mirror helps you ensure you are in proper alignment in poses. It gives you instant feedback if you are performing a pose incorrectly so you can adjust.

2. The mirror allows you to monitor your progress. As you work hard at something, you will gradually see improvement. And what is more gratifying than witnessing yourself improve?

3. Drishti is a point of focus where the gaze rests during yoga practice, and the reflection in the mirror serves as one during balancing poses. Focusing on a single point aids concentration because it is easier to become distracted when the eyes are wandering all over the room.

4. The mirror lets you view your half-naked body and every flaw it has and gradually make peace with yourself through familiarity. Let’s face it: we’re all so busy, who really has time to become at peace with their reflection in the mirror? Bikram yoga and the mirror provide this opportunity.

5. When you start to get tired or hot, the mirror becomes an outlet to look up and smile at yourself – or laugh if you lose your balance. Your yoga practice should be fun and uplifting. Don’t forget to give yourself some much-needed encouragement now and then by turning up the left side of your mouth and then the right to form a smile. (No, that is not one of the 26 Bikram yoga postures, but I think it should be!)

When you attend your next Bikram yoga class, please make sure to stagger yourself with other yogis around you, providing everyone with the maximum benefit of gazing at their own reflection in the mirror.


From idohotyoga.com

Monday, December 12, 2016

Tip of the Week: Yoga for Stress


What happens in your body when you get stressed out?


• Where do you feel sensation?
• What is the quality of your breath?
• How does your energy feel?
• What is going on in your mind and your thoughts?

Under stress, vicious cycles of all kinds can take hold – inactivity or overworking, overeating or under-nourishing, isolation or distraction, sleep deprivation or oversleeping, substance abuse or digital addictions. Coping behaviors can lead to even more stress. So how do we break the cycle?
We all have bad habits and good habits. Habits are just an accumulation of repeated thoughts and activities. Thoughts repeated become patterns… patterns repeated become behaviors… behaviors repeated can become personalities… and personalities repeated can become reality. In other words, our thoughts shape and can become our reality.
Repetition of thoughts and actions starts to create grooves, or samskaras, in our lives. Once you’re in a groove, it’s easier to stay there than to get out of that groove and into another one. Cars on the road or water on the ground follows the same pattern: staying in a smoothly worn path or channel is simply a lot easier to do than climbing up and out. Inertia and momentum are at work here.
So how does yoga and yoga philosophy figure into all of this? The first step is awareness. We can start by simply noticing what it feels like when we are stressed out – what are the sensations in body, breath, and mind. And the quality of awareness is non-judging. We simply observe.
Why is awareness so important? It’s nearly impossible to shift and change out of patterns that we don’t think are working for us if we don’t even know what they are!
Yoga asana is an amazing place to start practicing this awareness. Can we simply notice and observe what’s happening in a pose (as long as there’s no pain) without judgment? Without striving? Without clinging or pushing away what’s actually happening? When we can simply be with what IS rather than resisting it or wanting it to be otherwise, there’s less of an internal struggle, less resistance. We can reduce the extra layers of pain, suffering, and stress that we add on top of whatever it is that’s already going on.
The more we practice awareness in the safe space of a yoga class, on the mat, the easier and more familiar it becomes to carry that witnessing, observational quality off the mat into our day to day lives…. to not get so caught up in believing everything that is going on in our thoughts.
And that’s in itself is the definition of yoga: the stilling of the turnings or the mind, or citta vritti nirodha. We give the mind something to focus on so that instead of running around, it can calm down.
 

• When we focus solely on our bodies and breath in asana, we give our minds something to focus on and keep coming back to in order to stay present in the moment.
• When we practice breathing or pranayama, we keep our brains occupied with the quality and direction of our vital life force moving in and out.
• When we sit to practice concentration or meditation, no matter how briefly, we can start by concentrating single-pointedly on following the breath, or silently repeating a mantra – a word or phrase, or on a powerful image.

Once we have the ability to find a little bit of calm in our own heads, it’s easier to recognize thoughts and feelings without being swept away with them and without identifying with them. We can get to know our own patterns and simultaneously discover that those thought and emotion patterns are not who we are – they’re simply how we have become accustomed to reacting to a kind of stressful situation.
When we can notice our reactions without getting wrapped up in them, we can actually be more connected to the moment and what’s actually happening right now. And then we can notice more skillfully what are the conditions that are causing us stress – and eliciting strong thoughts and feelings. Some of these conditions we might even be creating ourselves!
But many stress triggers will be beyond our control. So instead of fighting or fleeing from stressful situations, we can start to learn to flow with that stress… to stay present to whatever is arising – without struggle – and simply do the best we can given all the current circumstances. We can’t control what happens to us in the world, but with patience, awareness, nonjudgmental awareness, and mindfulness, we can start to learn how to cultivate more pure presence and less stories and layers of reaction. We can be more and more in the moment.
While many yogic practices help us to look at our negative thought patterns and allow us the opportunity to notice them and weed them little by little out of the fertile garden of our being, we also have to do more than just pull weeds if we want to grow beautiful and delicious plants! We also have to plant seeds and water them even as we keep diligently weeding.
During yoga class, when your teacher invites you to think of something you are grateful for, or encourages you to call to mind someone for whom you feel compassion, or offers you the opportunity to set an intention or a sankalpa, these are all opportunities to build and strengthen a new habit of looking for the good, for the beautiful or the shri. These positive things are always there, we just might have to shift what we are looking for. It’s not to say that we should deny or ignore the darkness or melancholy, the anger or fear, the jealousy or negativity, that we pretend everything is hunky dory. But when we reflect on how a challenging pose or a challenging experience offers us the opportunity to get stronger or to grow, how simply observing our thoughts with kindness can help us be more loving towards ourselves in a way that simply no one else can, we may be a little more inclined to remember that the sun is there somewhere behind the clouds even when we are in the eye of the storm or weathering the darkest of days.
Awareness, breath, movement, and meditation are all practices we can do on the mat and in the studio…. But really they’re all preparation for how to surf the stresses and storms of day to day life with less suffering and more steadiness and ease.
Written by Elizabeth Kanter, a DC yoga therapist teaching stress relieving classes at Yoga District yoga studios in Washington DC.

Sunday, December 4, 2016

Tip of the Week: Engage Abdominals in Cobra Pose


A rock climber scaling the side of a mountain peak finds the courage to reach for the next handhold from knowing she’s safely tethered to her guide rope. It’s the same with yoga. You can dare to explore challenging poses if you know how to safely enter and come back out of a pose whenever you want.

Bhujangasana (Cobra Pose) is an invigorating backbend that can feel like an exciting journey. But if you tend to create most of the bend in your lower back, it can cause compression and pain, and excitement is quickly replaced by fear. Since the lower spine is naturally more flexible than the upper spine, it’s easy to overdo the arch there. Ideally, you work toward an even bend along the whole spine, including your neck. It helps if you learn to work carefully, making conscious choices each step of the way.

To create an even, pain-free Cobra Pose, learn to engage your abdominals in the pose—they act as the guide rope that keeps you safe. The abdominals can support and protect your lower back while you reach for more opening in the upper back. Once your lower back is stable, you can focus on contracting your upper-back muscles and pressing your shoulder blades into your back to create space in the spine and open your chest. As long as you feel supported, you can keep going deeper, continuing to press your upper spine in toward the front of your chest and coiling—like a snake—into a big, healthy backbend.

When you’ve found your ideal alignment in Cobra, you can use it to strengthen the upper back and the backs of the legs and to stretch your chest and shoulders. The backbending action is powered by the muscles of the back of the body. But the pose is also a powerful way to tone the abdominal muscles: They get stretched as you move into the backbend and contracted as you control the movement and return to your starting point.

Cobra will invigorate you energetically as well. It stretches the intercostal muscles (the ones between the ribs), which allows your rib cage to expand and thus can increase your breathing capacity. It’s also thought to gently squeeze the adrenal glands, giving you a feeling of alertness and vigor.
Bhujanga, the Sanskrit word for “snake,” is derived from the root bhuj, which means “to bend or curve.” The king cobra, revered in Indian myths, can glide forward while lifting the upper third of its body upright. Try to emulate this animal’s powerful yet fluid motion when you practice. Imagine your legs as the snake’s tail, reaching long behind you as you curve your spine to lift your chest majestically.

Refine: Press your hands into the mat while pulling them back against the resistance of the surface. This can help you lengthen your waist. Drop your shoulders away from your ears and press your shoulder blades forward into your chest. Gently lift your navel, pulling it toward your lower back.

See if you can lift your chest farther off the mat. Think of creating space by lengthening your spine first, reaching your tailbone back. Once you’ve created space, use the strength of your upper-back muscles to move your spine forward as you broaden and lift the chest. Slowly arch forward and up, maintaining just enough lift in your belly to keep your lower back happy.
Adjust Yourself: Tips for a Pain-Free Cobra
  • Make Space First: Your upper back is harder to bend than your lower back. To open it, lengthen your spine, which makes more space between the vertebrae.
  • Release Tight Muscles: Instead of squeezing your buttocks, which can compress the lower back, relax them. Roll your inner thighs up to lengthen your tailbone back.
  • Exit With Care: Come out of the pose gradually to allow your spine to decompress.
Elements of Practice
Yoga, which means “union,” is always a marrying of opposites. As you practice Cobra, you exert a forceful effort to create a big, beautiful backbend. But the pose also calls you to balance this with a hint of the energy of forward bending. You’ll experience this when you round in your belly to support the spine, but it’s also in the feeling you bring to the pose. Forward bends are associated with softness and surrender. Try practicing Cobra with a quiet sense of introspection to temper your willpower and remind you that yoga is always about balance and contentment.

From yogajournal.com

Saturday, November 26, 2016

Tip of the Week: Keep a Nice Tight Grip


"Get a good, tight grip" has got to be one of the most repeated phrases in class. These instructions are not arbitrary. The grip strengthens your hands, flexes the muscles and tendons, and builds power using your hands in every day life. Grip is essential both in order to allow you to correctly perform the postures, and because it directly benefits your fingers, hands, wrists and arms. Next time you're in class, focus on your hands. If necessary, go easy in the postures and concentrate on the placement and motion of your wrists, palms and fingers. Over 25% of our body’s bones are located in our hands. Yoga is a chance to fully engage the complex array of muscles, tendons and ligaments around them, and to reduce inflammation, remove built-up stress and increase range of motion.
 
The standard beginner’s Bikram grip is interlacing your fingers to the webbing, including the thumbs. By applying pressure to your grip through kicking or pulling, you build strength and flexibility in your hands, fingers and wrists. 

We use this first in Pranayama breathing at the start of class, which gives you a chance to get comfortable interlacing your fingers. You want to keep your wrists as straight as possible as you bring your elbows up. 

When doing postures where your arms are over you head with your fingers interlaced, pointer fingers together as in Half Moon and Balancing Stick, your palms should be pressed flat together with your pointer fingers pressed together. Tip: The more you press your palms and fingers together, not only will you be strengthening your hands, but you will also be toning your arms.

In Hands to Feet Pose, this is where you will hear "Get a nice tight grip. Don't lose your grip!" Pulling is the object of stretching in this pose. If you can keep a tight grip on your heels in this pose, along with Standing Separate Leg Stretching Pose, the more you'll be able to stretch your hamstrings and pull your torso closer to your legs.

Our grip really gets put to the test in Standing Head to Knee Pose. First, you want to wipe your hands to make sure your grip is dry and not slippery. Again, you want to keep your wrists straight to prevent repetitive strain over time. Interlock all 10 fingers for a strong grip so your foot does not slip out of your hands. Tip: You should be using mostly core and leg strength to lift your foot. So much so that if you were to release your hands from under your foot it would remain in the air. Interlacing all your fingers, including thumbs, is recommended. However, if your thumbs will not cross and if/when you are going deeper (actual head to knee), the adjustment is to keep only your 8 fingers interlaced, with your thumbs pressed next to your index fingers. The most important thing is to keep your wrists straight. 

In Standing Bow and Floor Bow Poses, the strength of the posture is more in the kick than in the arm strength, so you actually want to have a lighter grip. Instead of holding on with a tight grip to the feet or ankles, think of yourself as "hanging" from your feet, using your fingers only, and keeping your wrists straight.

In Wind Removing Pose, with your fingers interlaced tightly together, try to not have any space between your palms and the area below your knee.

Placing your palms face-down beneath you in Locust Pose strengthens your wrists, arms and elbows to protect against repetitive strain injuries. 

In Savasana, relaxing your arms and turning your palms to the ceiling promotes the positive flow of energy and receptiveness.

Wednesday, November 16, 2016

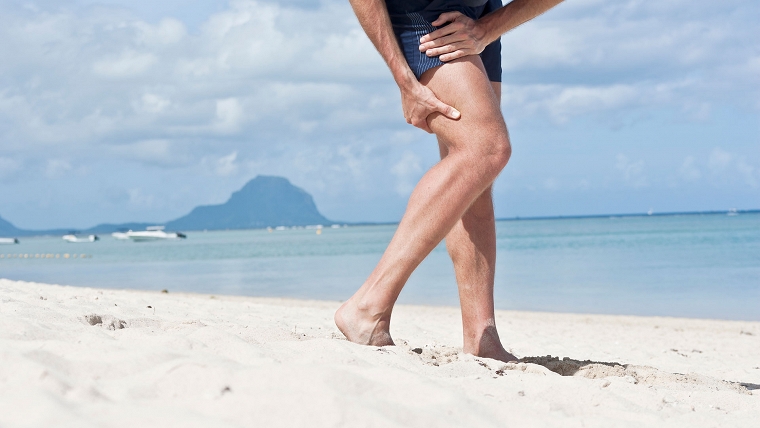
Tip of the Week: Prevent Hamstring Injuries

In Bikram yoga we often say to "lock the knee". This does not mean to hyperextend the knee, but to lift the kneecap by engaging your quadriceps and hamstrings. Not only does this give your leg more support to make your standing postures more stable, it also helps to prevent injury to the hamstrings especially when doing forward bends. The following article by Doug Keller for Yoga International discusses ways in which we can prevent hamstring injuries from occurring. 
 
Healing (or Preventing) Hamstring Injuries
 

Yoga students are vulnerable to overstretching the hamstring muscle and tearing the connecting tendon. Follow these tips to avoid—or even heal—hamstring injuries.   


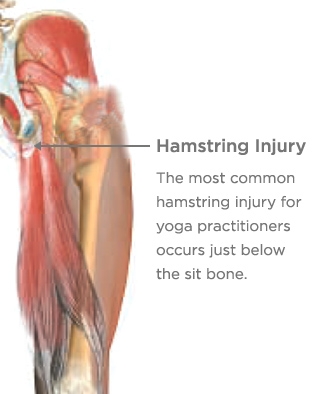
Ask any room of yoga students whether they suffer from pain at one or both of their sit bones, and you can count on a showing of hands. This kind of pain comes from injury to the hamstring attachment. Of course, hamstring injuries are not unique to yoga, though the cause and treatment of this particular problem often is. The more dramatic hamstring tears occur in sports and especially while running, when athletes are tightly wound and move in sudden bursts that wrench and tear at the hamstrings, usually in the “belly,” or middle part, of the muscle. In yoga, the injury occurs in a different way and at a different place.


For people who practice yoga, hamstring injuries develop over time, usually where the hamstring attaches to the sit bone. This is a tendon injury, and unlike a muscle tear, it doesn’t happen suddenly. Instead, it is “death by a thousand cuts”: each tiny rip in the tendon is relatively minor by itself, but because it does not fully heal, repeated injuries accumulate over time, until an ill-considered bit of overstretching or an overly aggressive adjustment from a teacher finally puts the injury over the edge.
Tendon injuries are in a class by themselves. They require a specific regime for healing that is very simple but requires time, patience, and persistence. The alternative, however, is even less attractive. Left alone, an injury to the hamstring attachment can take six months to a year to stop hurting—and even then it does not mean that it has fully healed. The attachment remains far more susceptible to re-injury than a tendon that has been properly treated.


Each little “cut” in the hamstring attachment occurs when the muscle is not engaged and thus cannot protect itself. Immediately after the injury—however tiny it is—adhesive scar tissue forms. While this scar tissue is meant to protect the tendon as it heals, quite often the scar tissue hampers the healing process, preventing a full recovery. Scar tissue limits circulation and stiffens the tendon, leaving it more vulnerable. We tend to dismiss each little injury after enduring some soreness, but the injury is really cumulative. Repeated re-injury and the formation of more scar tissue can extend over years, progressively weakening the tendon.

Learning how to engage the hamstrings is the first step toward preventing a hamstring injury (or healing an injury if it has already occurred).


In yoga, there is ample opportunity for this to happen, usually in the process of doing forward bends. As beginners, we are taught to fold forward at the hip joint (rather than at the waist) with a straight spine, maintaining a natural arch in the lower back through most of a forward bend. Students with tight muscles are rightly encouraged to bend their knees to release their hamstrings somewhat and maintain a flat back as they bend forward. This helps protect the lower back and gives a better stretch to the otherwise hypercontracted hamstrings.


As we get more flexible, we continue the same habit and even overdo it. This is especially true for students who were naturally limber to begin with. The natural arch we sought becomes an exaggerated lumbar curve, and the forward bend becomes more of a swan dive in which the sit bones flip upward as the pelvis tilts forward. Because the hamstrings have learned to release to allow this free fall, they start to act more like bungee cords—relatively slack on the way down through most of the dive, suddenly pulling taut at the far extreme of the bend. Each sharp tug causes a little rip that frays the hamstring where it attaches to the sit bone, because this is the place of the greatest leverage and thus the hardest pull.

We’re taught to engage the quadriceps to protect our knees; indeed, “Lift your kneecaps!” is repeated like a mantra by yoga teachers. But no one tells us to engage the hamstrings to protect them from this injurious yank. Learning how—and how much—to engage the hamstrings is the first step toward preventing this injury or healing the injury if it has already occurred.

The Mechanics of the Hamstring

The most effective strengtheners are simple backbends such as the locust and bridge poses, in which the hamstrings are used to extend the hips. 

We can start by looking at how the hamstrings function. One of their duties is to bend the knee and pull us through our stride as we walk or run, which is why runners typically have such tight hamstrings. The muscle is used in this way when the lower leg moves freely.

But the hamstrings also have a postural function—holding us upright—which works the other end of the muscle, at its origin at the sit bone. The hamstrings anchor the pelvis by drawing the sit bones toward the backs of the legs. If the hamstrings were to completely release their hold at the sit bones, we would flop forward at the hips like a rag doll. The hamstring performs this action when the lower leg is fixed (i.e., not free to move), and for this reason, the hamstrings can get tight simply from standing a lot or doing work that involves bending forward for long periods.


We feel this postural action of the hamstring as a contraction of the tendon where it attaches to the sit bone, at the lower crease of the buttock. At its extreme, this can cause a tucking of the pelvis when the hamstrings are hypercontracted. Good posture comes about through balanced tone between the quadriceps and the hamstrings. Bad posture throws off this balance, causing tightness and chronic hypercontraction either at the front or the back of the hip joint.

Preventing Hamstring Injuries

In a forward bend, this postural action of the hamstring needs to be engaged just enough to protect the muscle from overstretching. If this idea of engaging your hamstrings at your sit bones seems hopelessly abstract, try the following exercise. Stand with your feet separated and slightly bend your knees. Isometrically pull back with one of your feet. You’ll feel your hamstring engage, and your sit bone will want to tuck under somewhat from the contraction at the top of the hamstring. In this case, the hamstring draws or pulls from your sit bone down toward your knee. If you were bending your knee to lift your foot, the direction of energy would instead be from your lower leg toward your sit bone.


For the hamstring attachment to be protected, we want to draw the energy from the sit bone toward the knee, so that the hamstring will act as a brake in the forward bend. This action is of the essence in yoga; it is known as “eccentric” (pronounced “ee–centric”) stretching, meaning that the muscle remains engaged as it is lengthened. For example, if you were to curl a barbell up using your biceps and then very slowly lower it down, extending your arm until it is nearly straight, the lengthening that takes place in the biceps is known as an eccentric stretch—one in which the muscle is both contracted and lengthened at the same time, in measured coordination. This brings greater strength to the muscle in the very process of stretching it. In a forward bend, the hamstring stretches eccentrically, acting as a brake as it lengthens, thus balancing strength and suppleness while sparing the hamstring attachment from injury.

Healthy Hamstrings in Yoga

Let’s apply this technique in a yoga pose. We can take as an example the wide-legged forward bend (prasarita padottanasana). Step your feet apart wide and keep them parallel to each other. While maintaining a straight back, bend forward at your hips to touch the floor. You can bend your knees to protect your back as you fold forward; once in the pose, your legs should be straight unless tightness in your hamstrings makes your back round.


Once in the pose with your legs straight, make sure your knees are not locked or hyperextended. Engage your quadriceps, drawing energy up from your kneecaps toward your hips. You can connect that engagement of the quadriceps to a complementary engagement of your hamstrings: imagine that energy is traveling in a circle down through the backs of your legs. Engage the hamstrings by drawing your sit bones just slightly down toward the backs of your knees, so that the small spaces just beneath your sit bones firm. Your intention to draw your sit bones down will also engage your buttock muscles. You can isometrically drag your feet back to get the action going, though the action is actually initiated from the sit bones turning downward toward the knees. Once you learn the action, you can maintain the balanced engagement between the quadriceps and the hamstrings even as you bend forward in the pose, controlling how quickly and how deeply you move. This same approach can be used in seated forward bends, too: draw your sit bones just slightly toward your knees as you lengthen upward through your spine and fold forward. Applying these techniques will help protect your tendons as you move through the asanas.

How to Heal a Torn Tendon

But what if the damage is already done? How do we heal an injury that has been building up for months or even years? A simple and effective system for healing tendon injuries has been detailed by Dr. Ben Benjamin in a series of articles that appeared in Massage & Bodywork magazine in 2004. As a healing regimen, it addresses two aspects of the injury: the buildup of adhesive scar tissue and the healing of the tendon itself.
The scar tissue can be progressively cleared by a simple massage technique he calls “frictioning.” Its purpose is to break up the irregularly formed scar tissue in order to restore circulation and facilitate the healing process. To friction a tendon, rub or pluck your finger crosswise on the tendon—in one direction only, not back and forth—with a degree of pressure that is enough to be uncomfortable, but not so great as to be painful. Do this for 5 to 15 minutes, taking breaks when your finger gets tired.

Injury is a great teacher, most often arising from patterns and habits of movement developed over long periods of time. Injuries awaken us to these patterns--and to new ways of moving and being within our body.
 
How might you reach the injury to friction it? You can recline on the floor with your knee bent and foot on the floor (or with the calf supported on a chair, so that the leg is at 90 degrees), and thus reach the exposed tendon to friction it with your fingers. It is possible to use substitutes such as a tennis ball or massage ball, reclining with the leg nearly straight and the ball on the tendon. In that case, bend the opposite knee and place your foot on the floor to help you rock your hips from side to side to get the massaging action from the ball. The ball will be less accurate and thus less effective than the finger; the plucking action is preferred.
The second part of the process involves small strengthening exercises, often combined with gentle stretching. The most effective strengtheners are simple backbends such as the locust and bridge poses, in which the hamstrings are used to extend the hips.


For the locust pose (salabhasana), lie on your stomach (with a folded blanket for padding under your hips) and extend your legs behind you, with toes pointed. Work one leg at a time. Rather than simply attempting to lift your leg, which can strain your lower back, work in the following way to concentrate the action in your hamstrings. On the injured side, point your toes and reach back through your big toe as if you were trying to push a button with it. Keep lengthening through your leg and big toe as the way to begin to lift your leg. You’ll feel your hamstring working, particularly beneath your sit bone. You can actively engage the tops of your buttock muscles, lengthening from your waistline toward your tailbone to protect your lower back—but you’ll probably find this happens automatically in this exercise. Your foot needs to only lift four or five inches from the ground; work up to three sets of five or six lifts. You can increase the strengthening action by putting a small weight, such as a small bag of rice, across your ankle. Work both legs to maintain a balance of strength.

For the bridge pose (setu bandhasana), lie on your back with both knees bent, thighs parallel to each other and your feet on the floor. Bring your feet close to your hips so that your shins are perpendicular to the floor. Maintain a natural arch in your lower back, leaving enough room to slip the tips of your fingers into the space just above your waistline. To feel the action of the hamstrings, isometrically pull your feet toward your hips (your feet don’t move) and feel how your hamstrings engage, especially at your sit bones. This exercise alone can be enough if your lower back is tender.

Keeping your weight centered in your heels, lift your hips off the floor. Press your shoulders and upper arms into the floor as well to lift and open your chest, but be careful not to push your head into the floor or tighten your neck in any way. Isometrically pull your feet toward your shoulders just enough to engage your hamstrings; at the same time, engage the tops of your buttocks to draw your tailbone toward your knees. Hold for a few breaths and then release, maintaining a natural arch in your lower back on the way down. Work up to three sets of four or five lifts.


Keep your thighs parallel throughout and avoid pushing excessively through your feet to lift up.
A simple and safe way to stretch the hamstrings in between exercises is to bend one knee slowly toward your chest while reclining on your back, then switch legs.

The program is always completed by applying ice to the injured area for 5 to 10 minutes and then resting it.
In summary, the basic program is:

  1. A gentle warm-up of the hamstring muscle, which can be accomplished by standing (with support) and swinging the leg forward and back like a pendulum;
  2. Frictioning of the injured muscle attachment;
  3. Strengthening exercises, combined with gentle stretches;
  4. Ice and rest.
The key to healing the hamstring attachment is consistency in following this program over several weeks. Work fairly gently and consciously. Sharp or severe pain indicates a more serious tear, requiring rest and medical attention.

Injury is a great teacher, most often arising not from a single miscalculation or moment of abandon, but from patterns and habits of movement developed over long periods of time. Injuries awaken us to these patterns—and to new ways of moving and being within our body. For yoga practitioners, a hamstring injury is a wake-up call that hits us right where we live!