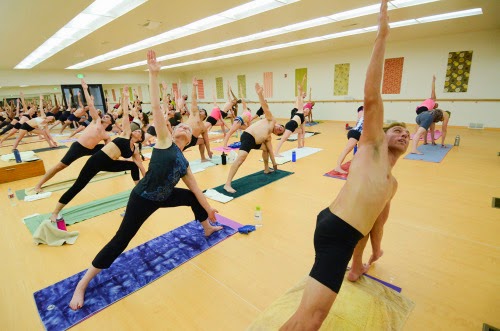
Roxanne shared a great tip last night. When you're looking at yourself in the mirror, take note of the color of your face. If it's looking red, you're likely forgetting to breathe and not inhaling enough. If your face appears white or pale, you're likely holding your breath not exhaling enough. Remember to constantly be aware of your breath, and to always inhale and exhale through your nose. For more information on the importance of staying in your breath, click "here". To learn about the "80/20" and "exhalation breath" breathing technique, click "here".
Loving this video from Bikram yogi and teacher Naomi Clark on how to quickly get yourself into savasana after a posture in just two moves. It's so true that many of us take our time slowly making our way to lying on the mat. Sometimes it takes us so long that we actually miss out on resting in savasana. It's so important to not cheat ourselves of those precious few minutes in between postures. Savasana is a shift from doing to being, consciousness to awareness. Savasana presents an opportunity to truly observe the effects of the practice while regaining balance.
The breath is the thread that ties your practice together. Breathing in and out through the nose is your body's natural way to help you stay present, calm, focused and in control. Focusing on your breath helps disconnect you from the external world and from your worries and obligations, enabling you to get the most benefit from your practice.
Being mindful of your breath also helps you pay attention to your body as you move into, out of, and through poses, so that you don't hurt yourself. Apart from the first and last
breathing exercises, breathe in and out through the nose. Breathe
calmly, smoothly and continually – never holding your breath. Inhale as you move upward/expand/open/lengthen; exhale as you bend forward/fold/twist/relax.
Use the 80-20 breath while holding poses, to help yourself move deeper into the pose (click "here" for detailed info on 80-20 breathing). Pay attention to your teacher's instructions. Think
about the breath at all times, and in time your breath control will
improve enabling a stronger and deeper practice.
If your breathing isn't relaxed, your body can't relax into the postures. If your body isn't relaxed, your mind can't relax. And if your mind isn't relaxed, you can't draw the full benefits from your yoga practice.
Last week we talked about the importance of alignment. The following information from Sterling Hot Yoga Works Mobile at shywmobile.com provides some insight and helpful visuals on how to keep your hips in one line. When we teach this wonderful healing yoga, you will often hear us
tell you to put “two hips in one line.” You may wonder what that means. Two hips in one line translates to alignment on a variety of planes.
For example, in Standing Separate Leg Head to Knee, we encourage you to
turn your hips, 1, 2, 3, 4, 5 times to get two hips in one line.
That one line is the saggital plane, assuming, of course, your hips are already on the transverse and coronal planes. Hold on, let me back up a bit. There are three planes that we refer
to (but never mention directly) when we teach yoga—the saggital, coronal
and transverse planes.Alignment on these planes, to the best of your ability, is what will
help you to stretch muscles and develop strength equally and
appropriately. The coronal plane is your body’s ability to maintain alignment from
right to left. So as you bend to the right in half moon pose, you are
working to stay in the coronal plane. Another way to look at it is to think of your body between two plates
of glass—as you come into half moon, no part of your body is pushing
against the glass plates, you are gliding smoothly between them. That’s
staying in the coronal plane.
Two hips in one line, in this example, mean that your hips
should be
square to the mirror to stay on the coronal plane. Look at the photo of
Taka (on the left) and Laura (on the right)—see how Laura’s hips are twisted out of alignment?
From the side you can see how her two hips are not in one line. You
cannot see Taka’s right hip at all; she is in coronal alignment.
The saggital plane is your body’s ability to maintain alignment from
the center line of your body. In your mind, take those two plates of
glass and shift them to your right and left side.
In tree pose, for example, when you pick up your right foot, make
sure that you don’t shift your hips to the left, thus leaning into one
plate of glass. Shifting weight is easy to do, and it helps you to counterbalance, but it brings your body out of the saggital plane. Just like in the half moon example above, the goal is to avoid
pushing or leaning into the glass. Keep two hips in one line by
continually stretching upward, engaging your core abdominal muscles and
contracting the quads.
In the example on the right, you can see how my hips are not
in one
line. In fact my whole body is tilted to the left side—see how my left
leg crosses into the white line?
The goal is to create alignment closer to the image on the left so
there is a mirror image on either side of the center line of the body.
The transverse plane is your body’s ability to stay level. The plate of glass just moved to the floor.
In spine twist, for example, it’s important to keep your both hips on the floor to maintain integrity in the transverse plane.
When one hip comes off the floor, your transverse plane is
compromised and that compromise extends up through the entire spinal
column!
When we refer to the transverse plane, we are usually using the term “level” to keep you in alignment. In the photo example here, Laura on the right has her right
hip off
the transverse plane—and look how it affects her whole alignment
structure.
She’s also out of alignment from the saggital plane—see how her spine
is crooked? Because Taka’s hips are both on the floor, the rest of her
body is better aligned.
Who would have thought that two hips in one line could have such important meaning?
As you practice for the next few weeks, focus on your alignment in the coronal, saggital and transverse planes. Work to get your hips square and level during the setup, the full
expression of the pose and the dismount. And two hips in one line will
bring a whole new awareness to your practice!
Without proper alignment, depth of the posture is irrelevant. First
focus on getting the correct alignment of the posture and when you have
achieved this, the depth will come naturally. Try not to be concerned by
where anyone else is in the class, simply focus on your own ability. Honor your body and acknowledge its strengths and limitations. It’s so easy to get caught up in the moment. Even those of us who aren’t
particularly competitive may feel like we have to go as deep as the person next to us.
But we don’t and we shouldn’t if it isn’t right for our particular
body.
In
Half Moon Pose, for example, even if you can only stretch a few inches,
respect your degree of flexibility and resist any temptation to force
or strain.
Trust your judgement and allow mind and body to work together. It will
always be easier to stretch one side of the body than the other so you
must accept that and work with it. Apply
extra effort to the stiffer side without straining or compromising
alignment or weight distribution. For best results, stay in line with
the planes when you stretch.
Pay close attention to the dialogue of the teacher. It so important to really listen to the alignment cues that a teacher
is giving you. Not only do such cues protect from injury and physical
stress, but they will also help to train your muscle memory to do the
postures correctly. With practice, eventually you will be able to feel
it in your body when you are misaligned. There is a keen sense of
postural awareness that is eventually attained, which some may consider
an added bonus or peripheral benefit to the practice. In an effort to take your asana practice into your daily life, try to
be more conscious of your posture when you are off the mat. The next
time you happen to notice yourself slumping over on the couch, take a
forward roll with the shoulders, draw them up by the ears, and then roll
them back down behind you, opening your chest. Perhaps even relax your face and
try to take a few breaths with focus. As you practice asana, listen to
the cues the teacher is offering you, and really try to understand
them in a postural way. Stack the knee over
the ankle when setting up Triangle Pose. Keep your shoulders away from your ears, chest lifted, crown of the head reaching upwards in Tree Pose. Listen to your body. When you feel a sensation in your knee, back out of
the posture. When you feel your breath shorten, come out of your twist a
little. These little tricks in your practice will start out as
enlightening moments of what it feels like to be good and aligned, but
eventually they will become second nature, and you will adjust yourself
instinctively.
The following article by Brynn Bellamy of Livestrong.com gives us some helpful ways in which we can improve at our postures. Students of Bikram yoga perform the same
26-posture series in every 90-minute class. According to Bikram theory,
the repetition enables practitioners to focus on each pose in ever-finer
detail and learn to pace themselves in the 105-degree heat. Despite its
intensity, the standard Bikram series is considered beginner yoga.
There also is a little-publicized advanced Bikram series available to
certified Bikram instructors and, by invitation only, to students who
achieve a degree of mastery over the beginning poses. Small changes to
your Bikram practice can help you take it to the next level.
In Standing Bow Pose, settle for less depth if it means you can keep your hips level.
Photo Credit Jupiterimages/Brand X Pictures/Getty Images
Step 1
Increase the frequency of your practice. Bikram
Choudhury, the founder of Bikram yoga, advises students to attend at
least 10 classes per month to achieve its baseline benefits. Yogis who
continue to deepen their practice, however, usually attend far more
frequently, never missing more than a day or two between classes.
Frequent practice enables your body's fascia -- the tense membrane that
surrounds your musculature -- to stretch slowly over time, deepening
your flexibility.
Step 2
Strive for endurance and intensity in the standing
series and focus more on depth in the floor series. The standing
series, roughly the first half of class, is intended to generate the
internal heat required for you to get deep into your body's organs and
muscles in the second half. Don't be surprised if you hear your Bikram
instructor say that the hard work you do up front will reward you later
in class.
Step 3
Listen closely to instructions and pay strict
attention to form. Every Bikram pose contains elements that must be
mastered in sequence. In Standing Bow Pulling Pose, for example, many
yogis have a tendency to flare out the hip of the non-standing leg,
dancer style, in order to pull that leg higher overhead. This may get
you more depth in the short run but compromises the integrity of the
pose and creates a literal imbalance in that you're more likely to fall
over sideways. Keeping your hips level, as directed, enables you to
develop a solid, balanced posture over time.
Step 4
Hydrate yourself well before class, but don't eat
or drink anything less than two hours before class. It's nearly
impossible to deepen your Bikram practice if your only goal is to
survive the class. Dehydration, hunger or a sloshing stomach inhibit
your ability to maintain stillness, absorb verbal instructions and find
your edge in a given pose.
Step 5
Check your diet. Bikram studio owner and 2005
International Yoga Asana Championship winner Esak Garcia advises
eliminating sugar and refined flour from your diet to reduce
inflammation that can inhibit joint mobility. Although researchers
haven't looked at sugar consumption and yoga specifically, the
University of Maryland Medical Center does advise osteoarthritis
patients -- who suffer painful joint inflammation -- to "avoid refined
foods, such as white breads, pastas and sugars." Excessive consumption
of alcohol, caffeine, junk foods and fat also may compromise the quality
of your practice.
Warnings
Improving the depth or beauty of your yoga postures safely
takes time and patience. A little discomfort is expected when
stretching, but never push your body beyond the pain threshold; doing so
can result in injury.
Tips
Consider signing up for a 30-, 60- or 90-day challenge. Bikram
studio operators often conduct promotional challenges during which
students commit to practicing every day for a set period of time. In
addition to enhancing flexibility, daily practice challenges students
mentally and emotionally, which can translate to deeper willingness to
perform postures mindfully and with correct form.
The reason I ask you to do this exercise is because sometimes it's
important to remember that you have already successfully faced down some
very terrifying things in your life.
If you are still alive, then it's a fact that you already survived the worst day of your life, so far.
If you survived THAT, surely you can endure THIS...right? Whatever is looming above you now, just try to remember that history has proven that you are more than equipped to handle it. So ponder the question: what have you done already that was outrageously brave? What will it take for you to realize the deep reserves of courage that you already possess? The above was written by Elizabeth Gilbert, author of "Eat, Pray, Love". Realizing that you are more brave than you even know can help tremendously with facing your fears, whether they be something you're facing in your personal life, not being afraid of falling in a backbend, or getting through a 30 day Bikram challenge. Don't be afraid of what you can do. You are stronger and braver than you know. You can do it.
Bikram Yoga SLC student Andrew Love is a 2 time Olympic trials competitor, holds 2 masters speedskating world records, won 2 Utah state championships last year on the bike (one road, one cyclocross), and uses Bikram yoga as part of his athletic training.
Photo from a race that qualified Andrew for the 2014 Olympic trials. "There
are elements of about 4 Bikram postures involved here in the body
position I am in (150 meters into a 1000m race). Fixed firm + Rabbit created the lower back flexibility for proper "cat
back" skating (It's very hard to hold that position at speed), and the whole "Awkward" series."
"Thanks
to Bikram!! Bikram
is a hugely powerful tool in my training. Its pretty much replaced gym
work for me. The way that modern elite training plans are being
written these days, there is always room for "foundational" work,
especially in early season phases. This is where Bikram has just been
hugely positive.
Also, the absolutely regular style of the class is really important. I
pretty much always know the training stress I will be inflicting on
myself when I step into a Bikram class. This matters a lot. Other yoga
styles, you never know if it will be creampuff easy or so hard no
student can finish.
Also, bike racing in Utah has heat as a significant fatigue factor.
(Heat & Wind will often break even very strong athletes) Heat never
bothers me anymore! It's an advantage.
Andrew during one of his training days.
As a
speedskater and cyclist I am a specifically imbalanced athlete, and this is one reason I find Bikram crucial. My imbalance could be best described as a dragster being an imbalanced car. If
a dragster's motor is too powerful for what the frame and engine mounts
can handle, it blows to pieces or flexes too much so you can't drive it
in a straight line. What
use are powerful legs if your torso and hips are not strong enough to
resist and guide the power they can generate? Just like a dragster, you will get hurt, or crash, or when you get tired, move with sloppy
technique.
Final
thought worth adding, I do find that Bikram's intensity is a fatigue
factor before your A+ category events. I tend to shy away from class
from 10 days out. Whereas during building training cycles, I make it
as regular of a 2nd workout as I possibly can... Classes AFTER racing
skates in the morning are always an adventure in determination.
Andrew doing Standing Bow Pose in his skates on natural ice.
If you didn't already know, hot yoga and Bikram yoga are two very different practices. The major differences between Bikram yoga and hot yoga:
Bikram
Bikram
yoga was developed by Bikram Choudhury. Since opening his Yoga College
of India in Beverly Hills, CA in 1974, Bikram's style of yoga has grown
in popularity and spread all over the West. Yoga studios that advertise this style of yoga must follow Bikram's exact methodology and use certified Bikram yoga instructors.
Every Bikram yoga
class is exactly the same - no surprises, ever! Class is always
comprised of 26 poses that are performed twice along with two specialized breathing exercises over 90 minutes. The heat
of the room is always 105 degrees and the humidity of the studio is set
at 40%. No music is played during a Bikram class and teacher’s
encourage you to take water breaks at designated times. If you like to
know what is coming next, you may enjoy Bikram for this reason. By repeating the same poses, you are also better able to see your progression in strength, flexibility, endurance and balance in each successive class.
Hot yoga
Many yoga studios promote hot yoga, which is a general term for any heated yoga class. Practitioners of this style still experience toxin release benefits, but may not be aware of Bikram's philosophy or exact practice. Hot yoga classes may follow any sequence and unlike Bikram yoga
classes do not always include the same set of postures. Hot yoga can be comprised of many different poses that vary by class and studio. Unlike
Bikram classes, the temperature of hot yoga classes ranges from 80-105
degrees, and the humidity of the room also varies. Hot yoga classes can
be anywhere from 60-90 minutes in length. Most hot yoga classes also
play music, which can be distracting for some yogis but more enjoyable
for others.
Although very different, both Bikram yoga and hot
yoga offer similar benefits. The crazy amount of sweating you do in both
scorching Bikram and hot yoga classes is believed to be extremely
detoxifying and helps to relieve stress.
The above picture is of Joseph Encinia demonstrating an improper way to do Cobra pose. "Am I using any strength? No. Compression in spine yes but no strength. Arms at 90 degrees develops both strength and flexibility." Remember that Cobra is not "Upward Facing Dog" nor is it a push-up. Make sure your arms are bent at a 90 degree angle. Push your elbows in towards the body, and push your elbows down towards your hips to bring your shoulders down more (notice how Joseph's shoulders are shrugging and his chest isn't lifting). You can read more on Cobra Pose by clicking "here".
*Arms should be out to the side like stiff airplane wings (contract those triceps!). *Contract your thigh and butt muscles and keep your legs glued together (Remember...a tight body is a light body). *Look up instead of straight ahead. It's tempting to see how you're doing in the mirror, but your body goes where your eyes go, and you will lift your torso up higher the higher you look. *BREATH IS KEY FOR THE LIFT! You will have so much more energy and be able to stay in the posture longer if you are breathing properly. Take one strong, deep inhale as you lift, then only let 20% of your breath out as you exhale through your nose. Inhale 20%. Continue with this 20% exhalation and inhalation as you hold the pose, keeping the lungs 80% full. 80/20 breathing is very important in this posture. DO NOT HOLD YOUR BREATH. If you come out of the posture with a big sigh and are panting heavily, you are not breathing correctly. Read more on 80/20 breathing by clicking "here". *Don't try to go to your full expression of the posture with all of your energy right away. Begin by lifting your entire body up slowly, then lift your chest up a little bit more. Then lift your feet up a little bit more. Then lift your chest up a little bit more, and so on until the teacher says to "come up one more time!" This is where you exhale one last time and lift your entire body, head, chest, feet with everything you've got.
*Activate the muscles of your back while engaging your core and pushing your hips into the mat. The more you push "down" with your hips, the more you'll be be able to come "up" with your chest and feet. *If you're having a hard time lifting your feet very high, try separating them and they should lift higher. Then during the final instruction of "come up one more time!" bring your feet together.
Since moving into our new studio in 2013, we've made a commitment to provide the highest quality Bikram experience for our students. Long gone are the days of practicing on musty carpeting. Our new flooring is made of Lonseal, a specialty flooring made specifically for hot yoga. Now with yoga flooring instead of carpeting, students can enjoy a more healthy and comfortable environment. The flooring emits zero toxins, is anti-fatigue, cushioned-step, with extra thick closed-cell foam-padding. We decided to not place a sealer on the flooring to make it non-slip, as this can be an issue in a sweaty hot room. Because of this, we ask a few things of you to help us maintain the floors: *Please pre-wash new colored towels before using them in the hot room. If the towel hangs over the edge of the yoga mat, it can easily stain the floor as our flooring is not sealed. *Please avoid bringing colored drinks into the studio. If a colored drink (especially Blue Powerade!) spills on the floor, it is nearly impossible to remove the stain. Clear water with a few drops of "elete" electrolytes or a pinch of salt is your best bet for hydrating (read more on this by clicking "here"). *Please use the fabric mops at the back of the room to wipe up any sweat or water from around your mat before leaving the room. THANK YOU for helping to keep our floors beautiful!
Bikram Yoga SLC student Karen Dee Tschorn at Silver Lake
Center your spine in Triangle Pose. This is a common mistake, even for Bikram yoga veterans. It’s likely a
common mistake because to do this properly feels weird, really weird. I
didn’t know I was doing this wrong until I had a teacher pull my arm to
straighten out my torso. When you bend your knee and go into Triangle
pose, it’s easy to let your torso tilt right (if you’re bending your
right leg). When you’re in the set up of the posture, look in the mirror
and picture someone pulling your left arm, creating a 90 degree angle
with your right thigh and your torso. It takes core strength to maintain
proper alignment. Then, when you tilt your body for the final
expression of the pose, try to keep the same alignment (in other words,
don’t let your torso shift or lean right towards your bent leg again).
This will allow you to use your core, maintain a “lift” in your posture
and get the proper stretch in your hips. If you do this properly your
oblique and abs will thank you.
~The above written by Lindsay Dahl at lindsaydahl.com. For a great video demonstration of Bikram Choudury doing Triangle Pose, click "here".
Raise your arms over your head, cross only your thumbs with your palms facing the ceiling. Flex your feet and contract your leg muscles.
Inhale and contract your abdominal/core muscles. Exhale and press the
lower part of your spine to the floor (this will help to protect your
back and actually make it easier to come up), and reach "up" as you sit
up,
keeping your legs straight and your heels on floor. Grab the big toes
with your first two fingers and lay your
whole body out flat on your legs, touching forehead to knees (it's
important to touch forehead to knees as this the compression part).
Touch the
floor on either side with your elbows and stretch forward twice. Double
jerk, double exhale. Note that this is one of the few times when you are
exhaling through your mouth and not your nose. Try to stretch further and further with each sit up you do.
Our extra tips for today are:
*Keep your arms with your ears the entire time.
*Glue your heels to the ground the entire time.
*Instead of reaching straight up and doing a "pike" before coming down, which can be uncomfortable on the lower back, reach up but come straight forward toward the toes in one smooth movement.
*Before you begin the sit up, take one long deep inhale and hold the breath in until you get to the forward bend, and then double exhale. The sit up should be one continuous motion, as opposed to sitting up, and then stretching forward in a separate breath. *Please
note that the Bikram sit ups energize and empower you. The more
seriously you take the sit ups, the harder you exhale, the more energy
you will have for your next posture.
With the air quality in our city being so poor lately, have you wondered why you actually find it easier to breathe in the studio? This is because our studio at Bikram Yoga SLC has a specialized fresh air and heating system that is the perfect marriage between fresh air, heat, and humidity. We have developed a state-of-the-art fresh air system that pumps fresh air along with consistent heat and humidity. We have made every effort to care for the health of our yogis by ensuring that
the air quality in the studio is well oxygenated, properly humidified
and disinfected from harmful germs.
At Bikram Yoga SLC the room is always being pumped with fresh oxygenated air! We knew there had to be a better system than simply closing the doors and turning up the heat. We've gone through great lengths to maintain the air quality in our studio within a healthy range. Our fresh air system pulls air from the outside, and goes through a large complex filtration system, eliminating all airborne bacteria. This fresh air is pumped through the system along with consistent heat and humidity. The result is fresh air that doesn’t smell and is not full of harmful
bacteria.
Ever wonder why Bikram Yoga SLC does not smell badly? We have spent the
time, energy and expense to make sure that our classes never smell and
that you are breathing the freshest cleanest air possible. Our clean air system will greatly reduce CO2 levels and eliminate and destroy: bacteria, odor, mold & mildew, viruses, V.O.C.’s, cleaning chemicals, smog and other airborne pollution.
The benefits of a clean
air environment are enormous. Clean air will help prevent colds and
influenza, prevent headaches after class, provide relief from asthma,
hay fever and sinus problems, reduce fatigue, and breathing problems,
and relieve sore throats, runny noses, wheezing and sneezing. Practicing yoga at Bikram Yoga SLC will have a dramatic effect
upon your physical and mental well being.
Where is the coolest spot in the room? Unlike other studios that are thermostat controlled where there are hotter and cooler spots, our studio does not have this problem. Due to our system, there is a consistent temperature of 105 degrees and 40% humidity every minute of class, regardless of the number of people in the room or how hard they are working. Instead of a thermostat that just switches on or off, we use sensors in the room that can sense accurately the temperature and humidity in the room, and give instant results. Everything works on a bell curve, to instantly increase or decrease fresh air flow, heat and humidity depending on class size. The speed of the motors is always changing during class. All is computer controlled with accuracy down to the hundredths. All of the variables are computerized with a software program written specially for us so we can monitor our system and see that the temperature, humidity, and fresh air is always consistent. We can see that as the students are emitting more heat and breathing harder in the cardiovascular series, such as Standing Head to Knee Pose, the motors of the system begin to speed up to pump in more fresh air and remove the bad air. At the same time, the heat in the room is being decreased. The system knows what's happening in your body before your body can even sense it. The CO2 levels are kept to a minimum, and you are able to breathe easily.
So the next time you're in class and you hear the teacher say, "inhale"...you can really "INHALE"! You will be oxygenating and energizing the cells in your body with very fresh, healthy air.