Visit our website!

Sunday, July 26, 2015

Tip of the Week: Stretch Your Pinky Toes Back


 2015 Utah/Wyoming USA Yoga Asana Champion Nella Holden


When pulling on your flexed feet with your hands during Janushirasana (Head to Knee Pose), and pulling on your big toes with your first and second fingers during Paschimottanasana (Stretching Pose immediately after Head to Knee Pose), focus on actively stretching your pinky toes towards your body. Our natural tendency is to stretch our big toes back towards our body, causing our feet to go out of alignment. By instead focusing on stretching the pinky toes towards us, we are better able to keep our feet and ankles in alignment. Stretching the pinky toes back also helps to engage the outer quadricep muscles which in turn helps to straighten the legs, lock the knees, and bring the heels off the floor. If you're unable to straighten the legs during these postures yet, try stretching the pinky toes back and see if that helps to bring your legs just a little bit straighter.

Sunday, July 19, 2015

Tip of the Week: Work Your Logical Brain with Yoga


Awesome video from brainboostcamp on how to give your logical brain a great workout with yoga! 

"Our aim with each posture is to challenge and train the logical brain (the prefrontal cortex) to achieve long term improvements in its ability to redirect attention and thoughts and suppress the emotional brain. This training will raise the threshold at which our emotional brain triggers a stress response in any situation. We can increase the load against which our logical brain has to train by including stretching, muscle contraction and backward bending, all of which may temporarily raise the 'tense' signal. Regular practice at this can result in longer term improvements in attention control and the avoidance of rumination. 

There are four aspects of yoga postures that will help achieve this, as this short video shows. If a series of yoga postures meets these criteria, you are likely to be giving your logical brain a great workout!"

Tuesday, July 14, 2015

Tip of the Week: Fix Your Neck During Pranayama


Today's tip comes from Gabrielle at Hot Yoga Doctor:

What do you do if you have a neck ache that prevents you from doing Pranayama to start with? Sitting out is an option but (besides being awkward and annoying) what if I were to give you a technique to fix your neck DURING Pranayama?
Yep, it works in many, many cases. Just be careful to follow these crucial and precise directions, and listen to your body.

You already know the basic Pranayama 101 rules:

  • That you have the hands at the chin and you move the elbows up and then together in front of you.
  • And you know that you move your head back and forth. And you know you’re supposed to coordinate these 2 activities.
  • So you know you inhale as you raise the elbows and bring the chin back to parallel with the floor.
  • Then you exhale and push the fingers into the chin to push the head backwards while bringing the elbows together.
Once you understand the many, many nuances you can get through Pranayama, and really deepen your breath and get a stretch.

Now to get one huge leap further and fix your neck takes some attention.

Simple … IF you’re actually doing it consciously

It sounds simple. In fact I warn you now. You’ll probably read the following paragraphs and say to yourself “I am already doing that”. But you actually are not. You’re doing something that seems similar. This technique really needs you to be super conscious and attentive of head/hands connection, 100% of the time. Not just drifting in and out of that mindful attention. I am serious. So please, stay open-minded.

When you press the fingers against the chin instead of allowing the neck to be pushed back easily, press back strongly with the chin to RESIST the movement, and slow the movement of the neck backward and forward … right … d o w n.

In other words consciously press the chin into the hands as the hands press the head backward. Then press the jaw into the fingers as you lever the elbows back up again. Make it active rather than passive. If you think you’re doing this, then it’s likely you have constant contact, but I can guarantee that you can quite massively increase those reciprocal forces … otherwise this will simply not work.

Most people have the contact (most of the time) but it’s pretty passive. This action takes a lot more attention. Mark my words, this is placing a new focus on the interplay between head and arms. It also takes more energy and can (aka will) make Pranayama quite a lot more tiring.

When I have had a neck ache from sleeping funny, if I pay attention to the active pressing and resisting of head and hands I can feel the kinks iron out from 1 to half a dozen cycles. Conversely, if I just try Pranayama without this technique, I literally cannot participate.

For a video on Pranayama breathing, click "here".

Tuesday, July 7, 2015

Tip of the Week: Understanding Muscle Groups

Today's tip is understanding the relationships between muscle groups to get the most out of your practice. For almost every major movement in the body, there is an agonist and antagonist muscle involved.

The agonist muscle is the primary mover involved. Usually this means a contraction or shortening of the agonist muscle in order to create movement.

The antagonist muscle has several functions. It can relax (lengthen) in order to allow the agonist muscle to function to its fullest. It can also slow down the movement of the agonist muscle to prevent tearing or overuse.

An example is the biceps and triceps muscle group. When you do a biceps curl (see image above), the agonist muscle is the biceps, and the antagonist muscle is the triceps.
Now this is where it can get tricky. When you create the opposite movement—when you bring your hand AWAY from your shoulder (see image below)—the agonist muscle is the triceps and the antagonist muscle is the biceps.


This is because in order to create the movement of bringing the hand away, the triceps has to contract or shorten and the biceps has to lengthen or relax.

Why is this important in yoga? Because if you understand the relationships between muscle groups, you can work smarter to get the most out of your practice! 

When you contract (or shorten) your quads (agonist), you will help your hamstrings (antagonist) lengthen more effectively and more safely.

When you suck your stomach in, thus contracting your abs during a forward bend (agonist), you will help to more efficiently stretch the muscles in your back (antagonist).

Think about all the muscle pairs that work together in the movement of the body. Different movements will engage different muscle groups in the wrist, arm, shoulder, spine, hips, knees and ankles. Think about what muscles you contract in order to get other muscles to relax.

*Some examples of agonist/antagonist muscle pairs that essentially counteract each other’s activity about a joint:

• Pectorals/latissimus dorsi—pecs and lats
• Anterior deltoids/posterior deltoids—front and back shoulder
• Trapezius/deltoids—traps and delts
• Abdominals/spinal erectors—abs and lower back
• Left and right external obliques
• Quadriceps/hamstrings—quads and hams
• Shins/calves
• Biceps/triceps
• Forearm flexors/extensors


Here’s another element to consider: as mentioned above, another job of the antagonist muscle is to slow down the movement to ensure a safe bend. In our muscles, there are these things called “stretch receptors.” They are there to prevent you from overstretching and tearing muscle.
When you first start to stretch, you might find resistance in the muscle. But if you hold the stretch, in a few moments, you might find some relaxation and give in the muscle, thus allowing you to stretch deeper. That’s the stretch receptor saying to the muscle, “Okay, I can see this is a safe stretch, you’re not going to tear anything—go ahead.”

This is why, for example, in Standing Separate Leg Stretching, it’s so important to both contract the quads (agonist) to release the hamstrings (antagonist) and also hold the pose for probably longer than you’d like to get the best stretch possible. Bouncing is not so good; a long, slow, firm and constant pull will get best results.

Tuesday, June 30, 2015

Tip of the Week: Yoga vs Calisthenics

Calisthenics is a form of exercise involving a number of rhythmical movements and stretches, generally without using equipment or apparatus. It is intended to increase body strength and flexibility with movements using only one’s body weight for resistance.  When performed vigorously and with variety, calisthenics can benefit both muscular and cardiovascular fitness, in addition to improving psychomotor skills such as balance, agility and coordination.

So what's the difference between calisthenics and yoga? 

As Tom explained in class the other night, yoga differs from calisthenics in that you go into each posture slowly, you find your max, breathe, then come out of the posture more slowly than you went in.

Think about this carefully the next time you are coming out of a posture. In Standing Head to Knee Pose, for example, you will hear the teacher tell you to reverse each step as you come out of it. Take the time to come out of each step of the posture as slowly and carefully as you went in.

Once you've reached your max through breathing and touching your forehead to the floor in Standing Separate Leg Stretching and it's time to come out of the posture, think about raising your forehead off of the floor even more slowly than when you tried touching it to the floor.

One of the fundamental things that takes yoga beyond what calisthenics offers is the focus on the breath. In yoga, the breath is constantly and consciously moving in and out slowly through the nose. The breath is what links the mind with body. Move your breath to find your max in a posture, and move your breath to come out of a posture.

Remember to keep your focus on your breath, and always come out of the postures slowly.


Monday, June 22, 2015

Tip of the Week: Don't Do the Half Moon Crunch

Half Moon Pose is NOT just a bend to the side.

Instead of focusing on only bending the upper body to the  side, focus more on pushing the hips in the opposite direction. If you only bring your upper body down to the side and leave your hips directly over your feet, you are crunching your side instead of creating a nice open C-shape.

Once you reach alignment with your hips square to the mirror, only focus on moving your hips to the side. You want to push your hips so much that they go further out past the sides of your feet.  If you only think about bending more at the waist you are not opening up the intervertebral discs. By focusing on moving your hips further out past your feet, you continue to lengthen and open up the body, giving more space between the vertebrae.  This will make the opposite side compress more and bring your upper body down naturally. Your arms and hips will pulling in opposite directions.

The “push, and push” at the end of Half Moon is intended to make the hips push out, not just push the body down more. By pushing the hips out, the body automatically has more room to bend while maintaining core strength.


In the photo below, she is mostly trying to bend her upper body to the side, and isn't pushing her hips in the opposite direction. She isn't able to fully lengthen and open up her body.  (As a side note, her arms also aren't touching her ears, and her feet aren't together. For more info on alignment in Half Moon, click "here".)


The photo above shows nice alignment with the hips pushing far to his left, further out past his feet, causing a nice open C-curve in his entire body.
(photo from Bikram Yoga Los Angeles)


Wednesday, June 10, 2015

Tip of the Week: Yoga for Insomnia


Maybe it's indigestion, something you ate that now torments your stomach and keeps you tossing and turning. Maybe it's overstimulation from drinking caffeine during the day, or just the garden-variety stress of 21st-century life--mental indigestion--that's got you up at night. All of these reasons add up to more than 35 million prescriptions a year in the United States for sleep medications.

Throw away those pills with their risk of dependency and bizarre side effects. Did you know that some people actually get up in their drugged sleep and eat like pigs or even drive their cars while they're on these medicines? Now that's a nightmare.

Yoga is the natural, effective prescription for insomnia. How does yoga prevent insomnia?

  • Yoga calms the sympathetic nervous system, which generates adrenaline (and the fight-or-flight response). With less of this hormone coursing through your veins, you can take your rest in peace. Since yoga asanas were originally designed to calm the body and quiet the mind, this makes complete sense.
  • Yoga stimulates circulation, including sending more blood to the sleep center of the brain.
  • Pranayama, or breathing exercises, also have a calming effect on the brain, reducing anxiety and arousal, and thus promoting sleep. In a study at the Harvard Medical School by Sat Bir Khalsa, PhD, insomniacs practiced daily meditative pranayama at home for eight weeks. After that, all of the subjects reported improvements in how long it took them to fall asleep, how often they woke up during the night, and their ability to get back to sleep.
  • You may actually need less sleep when you practice yoga due to the elimination of toxins from the body, which gives you more high-octane gas for your engine. Your mileage may vary, but it will definitely be improved. Take me: I barely sleep at all and I have more energy than anyone in the world! Ask anyone who knows me; it's true.

Rabbit pose is especially good for insomnia; however, your overall comprehensive practice is the best cure for any and all sleep disorders. Besides all the scientific reasons I cite above, giving your best effort in my heated Torture Chamber will definitely kick your butt! After that, you will definitely sleep. Sweet dreams, my friend.

From Bikram Choudhury's book "Bikram Yoga: The Guru Behind Hot Yoga Shows the Way to Radiant Health and Personal Fulfillment"

Tuesday, June 2, 2015

Tip of the Week: Backbend During Standing Bow Pulling


In Standing Bow Pulling Pose, you are trying to create a BACKBEND. As the name implies, you are trying to create a "bow" shape, much like in the floor Bow Pose.
 
Oftentimes when students go into this posture, they bring their chest and abdomen straight down, making their back straight. In fact it pretty much looks like Balancing Stick with a leg up in the air.
What you have to do first and foremost is work on the biggest deepest backbend you can muster.

1) After holding your leg in your hand bring your knees back together. Your shoulder will drift a little behind you
2) Bring up the other arm straight and strong, palm facing forward
3) Your hips are square and your shoulders are already starting to orient themselves one behind the other
4) Inhale stretch up as high and as strongly as you can, and on the exhale…
5) Kick the foot back into your hand, kick your knee up to the ceiling AND
6) DO NOT move your arm or body one little bit. They will move by themselves as you kick. But let the kick drive the pose. Let the shoulder get pulled back by the force of the kicking leg.
7) The whole time try to touch the ceiling with your front arm. You won’t be able to of course, but the action of this will help you create a better backbend.
8) Your back stays up. As you kick up your belly will come down all by itself. But try to keep the chest up as high as possible. 


For more tips on Standing Bow Pulling Pose, click "here"

Tuesday, May 26, 2015

Tip of the Week: Learn to Love the Heat with Final Savasana

Great tip from lindsaydahl.com on one way to learn to love the heat in Bikram Yoga: 


Take a long final savasana


Your instincts will tell you to jump up and leave, the moment the teacher leaves the classroom. And if you’re like me, the thought of laying in a hot sweaty heap one more millisecond sounds like torture. Rest assured taking a long savasana after class will help you handle the heat in future classes. When teachers first told me this I filed it away in the “yoga teacher BS” category, but here’s how and why it works:

During class you’re working your ass off. You’re heart rate is up, the heat feels intense and you’re constantly moving. When you have time at the end of the class to relax, all of your body’s systems slowly go back to normal. This process is important for several reasons, but when it comes to the heat, you’re body has time to adjust in a way it can’t during class. When you’re in final savasana the process of adjusting to the heat happens ten fold. Think of it as a period for your body to absorb the muscle memory from the work you did in the postures AND a time for it to recalibrate to the heat.
It’s kind of like your body getting used to a hot bath. After those first few painful moments, your body eventually adjusts to the temperature of the water.


Stay in savasana for at least twenty deep, slow breaths. Your future self will thank you.

Monday, May 18, 2015

Tip of the Week: Yoga Yourself Out of Bed

Happy Monday! Wouldn't you like to start your mornings feeling refreshed instead of sluggish? Here are some yoga techniques from yogatropic.com to help you get out of bed in the morning feeling restored.


Set Yourself Up for a Peppy Wake-up 


If you know you have to get up early, or even if you’re just not a morning person, there a few little things you can do at bedtime that will knock a few snoozes off your typical morning routine.


Eat light, not late


It’s wise to pack your heavier, protein and carb-dense meals into breakfast and lunch. Make dinner primarily veggies with a modest portion of whole grains and light, lean protein (like beans or fish). It’s also an excellent idea to avoid eating at least 4 hours before bedtime. Sugar, alcohol and caffeine are also evening enemies, making it difficult to fall asleep and even moreso to sleep well. If you know you need to be functioning at full throttle early in the AM, following these dietary tips will prevent your body from struggling to digest when it should be getting some rest!


Set your alarm earlier


Be honest with yourself — how many times do you normally hit the snooze button? Do the math, and set your alarm that many minutes earlier than you actually need to be out of bed. Utilize your snooze time to wake slowly and still get moving at a time that works best for your schedule.


Sleep in your yoga clothes


If you’re planning to start your day with a yoga practice (Yes, yes, yes! Do it!), swap your PJ’s for yoga pants! You’ll have no excuses in the morning, and yoga clothes are way cozier, anyway! While you’re at it, roll out the mat and set up your props, too. If you practice to a DVD or video, cue everything up so you can just press ‘play’.


Breathe yourself to sleep


If you’re having trouble falling asleep, skip the counting sheep and instead count the length of your breath, increasing the duration of your exhale so that it’s longer than the inhale. Let the breath be soft — not forced — and scan your body from toes to nose, inviting your breath to relax every muscle in between. If you’re still too energized, try the tense and release technique: squeeze and tense every muscle in your body, holding your breath, clenching your fists and drawing into your core for 3-5 seconds, or until you feel fatigued. Then release, and relax into your bed. Repeat 2-3 times until you feel your whole body grow lighter.

Sweet dreams!


Yoga Yourself Awake


When the dreadful alarm clock rings and you just can’t bear to move, hit snooze if you must… but then try this simple routine to get the blood and oxygen flowing so that waking comes naturally.


Fill up to wake up


The easiest way to begin waking the body doesn’t even require you to move! Stay right where you are, but begin breathing deeply. Just as if you’re waking from savasana, fill your chest to the brim, imagining that you’re flooding each and every cell with clean, energizing oxygen. Keep your eyes closed, and as you begin to feel more alert, roll onto your back and place one hand on your heart and the other on your belly. Feel your breath and feel the weight of sleep begin to shed like you’re slipping out of a heavy sleeping bag.


Stretch long and wide


When you feel ready, reach your arms overhead and take another big breath, then an even bigger one as you stretch all the way from the tips of your toes to as far as you can reach behind you. Stay here for a few breaths, letting your muscles grow longer. If you have room in your bed (and won’t kick anyone sleeping next to you…!), spread your legs and arms apart wide and stretch out like a star shining in all directions.


Give yourself a morning hug


Still moving slowly and breathing deeply, step your feet behind your hips, then hug one knee, then the other, into your chest. Wrap your arms around your shins and say “Good Morning!” to your lower back. If it feels nice, rock around gently — side to side, back and forth.


Twist into a new day


Next, take your left hand to your right knee, hug your right arm around your pillow, and drop your knees to the left for a gentle spinal twist. Let your gaze fall to the right and sink your hips into your mattress. Take 5 long, deep breaths before lifting your knees on an inhale and exhaling to the opposite side. Careful not to knee your partner, if you have one!


Sit up, Sunshine


By now, your alarm may have gone off again. Time to actually start moving out of bed. But, not so fast! Roll onto your right side and help yourself up as you would after a deep, rejuvenating savasana. Then turn yourself to the edge of your bed and let your feet hang off the side. Sit up straight and reach your heels forward, circling your ankles and stretching out your hammies. Delish!


Juicy side stretch


Let your feet come down, then beginning with your right arm, plant the left palm on your bed as you reach your right arm up and overhead for three longs breaths (see photo at the top of the page). Switch to your left, and if you have time, repeat once more on each side.


Stand tall: Ready for the day


Finally, plant your feet and on one giant inhale, stand up into tadasana (mountain pose). Feel your feet on the ground below you. Feel the expansiveness in your lunges and chest. Know that now, you’re ready for anything. Take the first step into your day with confidence and ease.
Namaste.

Monday, May 11, 2015

Tip of the Week: Keep Your Shoulders Away From Your Ears

As part of the Bikram dialogue, we are constantly told to keep our shoulders away from our ears. By bringing awareness to the position of the shoulders and adjusting them for optimal position, you will find comfort that may have previously been difficult to achieve. Many of us hold tension in the shoulders, often without realizing it. Poor posture and stress are common contributors to shoulder tension. The result: chronic tightening of the shoulders and a forward slump. (Check your posture while driving or typing on the computer and you’ll recognize the forward slump.)

Proper shoulder position is often overlooked during our practice due to the focus required to simply get into each posture and then maintain it. But if you take a moment to adjust the shoulders once in each pose, your level of comfort will increase. Keep in mind this one simple adjustment: Broadening the shoulders. Almost every asana can benefit from broadening the shoulders.

To broaden the shoulders, feel them move away from each other in an outward direction, and feel the heart open as the chest lifts slightly. Then, move the shoulders down away from the ears. Important to note, be sure you do not pinch the shoulders back. The movement of the shoulders away from each other is the best way to ensure the shoulders remain broad.


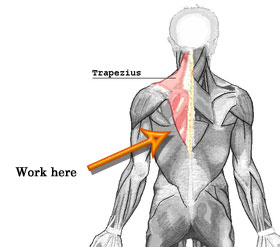
To effectively relax your shoulders, you need to focus on your shoulder blades (scapula) sliding down your back. The muscle that anchors the blades is the bottom part of the trapezius muscle. You also want to feel your collar bone (clavicle) widening and the scapula sliding slightly toward one another. The end effect is an open chest with relaxed shoulders and neck. Nothing should feel pinched or gripped. Imagine the scapula is a slippery bar of soap sliding up and down the back. 

From the very first breathing exercise Pranayama, as your elbows come up, your shoulders should be down. In every single posture from there on out, your shoulders should be down and away from your ears. Introduce this movement to each pose in your practice, and you will find a new sense of ease you didn’t realize you had. Enjoy!

Tuesday, May 5, 2015

Tip of the Week: Avoid Foot Cramping


Are you experiencing muscle cramping, particularly in the feet during class? The heat associated with Bikram yoga can quickly drain the body of fluids and electrolytes, which increases cramping. However, there are several steps you can take to reduce cramping.

1. Drink plenty of water before class. Dehydration is a common cause of muscle cramps. An electrolyte drink may  help reduce cramping because it lessens the severity of electrolyte and fluid loss. Rather than a sugary sports drink, click "here" for natural electrolyte replenishment ideas. For a quick way to turn your own water into an electrolyte drink, we have electrolyte add-in drops available for purchase at the studio. It's best to drink electrolyte drinks before, rather than during or after, Bikram yoga. During and after your yoga session, continue to drink plenty of fluids.

2. Keep your toes flat, rather than curled, while standing. This is especially important during one-leg postures, during which people tend to curl their toes to maintain balance. If you find yourself reflexively curling your toes, try spreading your toes instead. This ensures the development of proper muscle strength, and will help you maintain proper form.

3. At home, massage the bottom of your feet with a tennis ball. Put the ball on the arch of your foot and roll it from side to side, front to back, and in circular motions. Anywhere you feel a little discomfort, add a little pressure to work the knots out.

4. For a toe stretch exercise for the bottom of the foot:
  •  Sit in a chair, and extend your leg so that your heel is on the floor.
  • With your hand, reach down and pull your big toe up and away from the floor. 
  • Hold the position for at least 15 to 30 seconds.
  • Repeat 2 to 4 times a session, several times a day.


put the ball on the arch of her foot, roll it around from front to back, side to side, maybe some circular motions, lateral, wherever you feel knots, roll the ball over it. If you feel a little bit of uncomofortableness, stop and add a little pressure. That's going to be key for relieving the knots out of the foot.

Read more : http://www.ehow.com/video_12286124_avoid-foot-cramping-during-bikram-yoga.html
put the ball on the arch of her foot, roll it around from front to back, side to side, maybe some circular motions, lateral, wherever you feel knots, roll the ball over it. If you feel a little bit of uncomofortableness, stop and add a little pressure. That's going to be key for relieving the knots out of the foot.

Read more : http://www.ehow.com/video_12286124_avoid-foot-cramping-during-bikram-yoga.html
3. Keep practicing Bikram yoga as often as possible. Foot cramps commonly occur as foot and leg muscles develop the strength necessary to maintain form. By regularly practicing postures, you increase muscle memory and help your body gain the muscle strength it needs to support your weight without cramping.

Monday, April 27, 2015

Tip of the Week: Is Your Face Turning Red or White?


Roxanne shared a great tip last night. When you're looking at yourself in the mirror, take note of the color of your face. If it's looking red, you're likely forgetting to breathe and not inhaling enough. If your face appears white or pale, you're likely holding your breath not exhaling enough. Remember to constantly be aware of your breath, and to always inhale and exhale through your nose. For more information on the importance of staying in your breath, click "here". To learn about the "80/20" and "exhalation breath" breathing technique, click "here".

Tuesday, April 21, 2015

Tip of the Week: Get into Savasana in Just 2 Moves


Loving this video from Bikram yogi and teacher Naomi Clark on how to quickly get yourself into savasana after a posture in just two moves. It's so true that many of us take our time slowly making our way to lying on the mat. Sometimes it takes us so long that we actually miss out on resting in savasana. It's so important to not cheat ourselves of those precious few minutes in between postures. Savasana is a shift from doing to being, consciousness to awareness. Savasana presents an opportunity to truly observe the effects of the practice while regaining balance. 

Naomi Clark has an awesome website at naomiclarkyoga.com

Monday, April 6, 2015

Tip of the Week: Stay in Your Breath


The breath is the thread that ties your practice together. Breathing in and out through the nose is your body's natural way to help you stay present, calm, focused and in control. Focusing on your breath helps disconnect you from the external world and from your worries and obligations, enabling you to get the most benefit from your practice.


Being mindful of your breath also helps you pay attention to your body as you move into, out of, and through poses, so that you don't hurt yourself. Apart from the first and last breathing exercises, breathe in and out through the nose. Breathe calmly, smoothly and continually – never holding your breath. Inhale as you move upward/expand/open/lengthen; exhale as you bend forward/fold/twist/relax. 

Use the 80-20 breath while holding poses, to help yourself move deeper into the pose (click "here" for detailed info on 80-20 breathing). Pay attention to your teacher's instructions. Think about the breath at all times, and in time your breath control will improve enabling a stronger and deeper practice.

If your breathing isn't relaxed, your body can't relax into the postures. If your body isn't relaxed, your mind can't relax. And if your mind isn't relaxed, you can't draw the full benefits from your yoga practice.