Visit our website!

Monday, February 23, 2015

Tip of the Week: The Difference Between Bikram and Hot Yoga


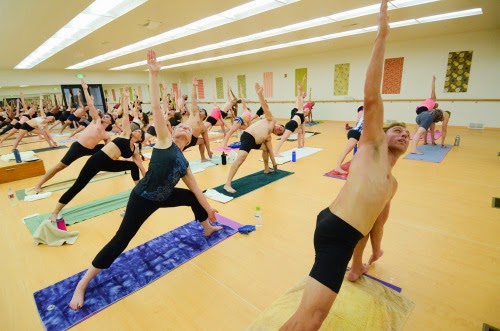
If you didn't already know, hot yoga and Bikram yoga are two very different practices.
 
The major differences between Bikram yoga and hot yoga:

Bikram 


Bikram yoga was developed by Bikram Choudhury. Since opening his Yoga College of India in Beverly Hills, CA in 1974, Bikram's style of yoga has grown in popularity and spread all over the West. Yoga studios that advertise this style of yoga must follow Bikram's exact methodology and use certified Bikram yoga instructors.

Every Bikram yoga class is exactly the same - no surprises, ever! Class is always comprised of 26 poses that are performed twice along with two specialized breathing exercises over 90 minutes. The heat of the room is always 105 degrees and the humidity of the studio is set at 40%. No music is played during a Bikram class and teacher’s encourage you to take water breaks at designated times. If you like to know what is coming next, you may enjoy Bikram for this reason. By repeating the same poses, you are also better able to see your progression in strength, flexibility, endurance and balance in each successive class.


Hot yoga 


Many yoga studios promote hot yoga, which is a general term for any heated yoga class. Practitioners of this style still experience toxin release benefits, but may not be aware of Bikram's philosophy or exact practice. Hot yoga classes may follow any sequence and unlike Bikram yoga classes do not always include the same set of postures.  Hot yoga can be comprised of many different poses that vary by class and studio. Unlike Bikram classes, the temperature of hot yoga classes ranges from 80-105 degrees, and the humidity of the room also varies. Hot yoga classes can be anywhere from 60-90 minutes in length. Most hot yoga classes also play music, which can be distracting for some yogis but more enjoyable for others. 

Although very different, both Bikram yoga and hot yoga offer similar benefits. The crazy amount of sweating you do in both scorching Bikram and hot yoga classes is believed to be extremely detoxifying and helps to relieve stress. 

Wednesday, February 18, 2015

Tip of the Week: Bend Your Elbows in Cobra

Photo by Wendy Debeck from Bikram Yoga Sidney
 
The above picture is of Joseph Encinia demonstrating an improper way to do Cobra pose. "Am I using any strength? No. Compression in spine yes but no strength. Arms at 90 degrees develops both strength and flexibility." Remember that Cobra is not "Upward Facing Dog" nor is it a push-up. Make sure your arms are bent at a 90 degree angle. Push your elbows in towards the body, and push your elbows down towards your hips to bring your shoulders down more (notice how Joseph's shoulders are shrugging and his chest isn't lifting). You can read more on Cobra Pose by clicking "here".

Monday, February 9, 2015

Tip of the Week: Full Locust Pose


Tips:

*Arms should be out to the side like stiff airplane wings (contract those triceps!).

*Contract your thigh and butt muscles and keep your legs glued together (Remember...a tight body is a light body).

*Look up instead of straight ahead. It's tempting to see how you're doing in the mirror, but your body goes where your eyes go, and you will lift your torso up higher the higher you look.

*BREATH IS KEY FOR THE LIFT! You will have so much more energy and be able to stay in the posture longer if you are breathing properly.  Take one strong, deep inhale as you lift, then only let 20% of your breath out as you exhale through your nose.  Inhale 20%. Continue with this 20% exhalation and inhalation as you hold the pose, keeping the lungs 80% full. 80/20 breathing is very important in this posture. DO NOT HOLD YOUR BREATH. If you come out of the posture with a big sigh and are panting heavily, you are not breathing correctly. Read more on 80/20 breathing by clicking "here". 

*Don't try to go to your full expression of the posture with all of your energy right away. Begin by lifting your entire body up slowly, then lift your chest up a little bit more. Then lift your feet up a little bit more. Then lift your chest up a little bit more, and so on until the teacher says to "come up one more time!" This is where you exhale one last time and lift your entire body, head, chest, feet with everything you've got.

*Activate the muscles of your back while engaging your core and pushing your hips into the mat. The more you push "down" with your hips, the more you'll be be able to come "up" with your chest and feet.

*If you're having a hard time lifting your feet very high, try separating them and they should lift higher. Then during the final instruction of "come up one more time!" bring your feet together.

Tuesday, February 3, 2015

Tip of the Week: How to Keep Our Floors Beautiful


Since moving into our new studio in 2013, we've made a commitment to provide the highest quality Bikram experience for our students. Long gone are the days of practicing on musty carpeting. Our new flooring is made of Lonseal, a specialty flooring made specifically for hot yoga. Now with yoga flooring instead of carpeting, students can enjoy a more healthy and comfortable environment. The flooring emits zero toxins, is anti-fatigue, cushioned-step, with extra thick closed-cell foam-padding. We decided to not place a sealer on the flooring to make it non-slip, as this can be an issue in a sweaty hot room. Because of this, we ask a few things of you to help us maintain the floors:

*Please pre-wash new colored towels before using them in the hot room. If the towel hangs over the edge of the yoga mat, it can easily stain the floor as our flooring is not sealed.

*Please avoid bringing colored drinks into the studio. If a colored drink (especially Blue Powerade!) spills on the floor, it is nearly impossible to remove the stain. Clear water with a few drops of "elete" electrolytes or a pinch of salt is your best bet for hydrating (read more on this by clicking "here").

*Please use the fabric mops at the back of the room to wipe up any sweat or water from around your mat before leaving the room.

THANK YOU for helping to keep our floors beautiful!

Monday, January 26, 2015

Tip of the Week: Center Your Spine in Triangle


 Bikram Yoga SLC student
Karen Dee Tschorn at Silver Lake


Center your spine in Triangle Pose. This is a common mistake, even for Bikram yoga veterans. It’s likely a common mistake because to do this properly feels weird, really weird. I didn’t know I was doing this wrong until I had a teacher pull my arm to straighten out my torso. When you bend your knee and go into Triangle pose, it’s easy to let your torso tilt right (if you’re bending your right leg). When you’re in the set up of the posture, look in the mirror and picture someone pulling your left arm, creating a 90 degree angle with your right thigh and your torso. It takes core strength to maintain proper alignment. Then, when you tilt your body for the final expression of the pose, try to keep the same alignment (in other words, don’t let your torso shift or lean right towards your bent leg again). This will allow you to use your core, maintain a “lift” in your posture and get the proper stretch in your hips. If you do this properly your oblique and abs will thank you.

~The above written by Lindsay Dahl at lindsaydahl.com. For a great video demonstration of Bikram Choudury doing Triangle Pose, click "here".

Tuesday, January 20, 2015

Tip of the Week: Perfecting the Bikram Sit Up


On a previous post "Tip of the Week: The Sit Up", we discussed the following:

Raise your arms over your head, cross only your thumbs with your palms facing the ceiling. Flex your feet and contract your leg muscles. Inhale and contract your abdominal/core muscles. Exhale and press the lower part of your spine to the floor (this will help to protect your back and actually make it easier to come up), and reach "up" as you sit up, keeping your legs straight and your heels on floor. Grab the big toes with your first two fingers and lay your whole body out flat on your legs, touching forehead to knees (it's important to touch forehead to knees as this the compression part). Touch the floor on either side with your elbows and stretch forward twice. Double jerk, double exhale. Note that this is one of the few times when you are exhaling through your mouth and not your nose. Try to stretch further and further with each sit up you do.


Our extra tips for today are:

*Keep your arms with your ears the entire time.

*Glue your heels to the ground the entire time.

*Instead of reaching straight up and doing a "pike" before coming down, which can be uncomfortable on the lower back, reach up but come straight forward toward the toes in one smooth movement.

*Before you begin the sit up, take one long deep inhale and hold the breath in until you get to the forward bend, and then double exhale. The sit up should be one continuous motion, as opposed to sitting up, and then stretching forward in a separate breath.

*Please note that the Bikram sit ups energize and empower you. The more seriously you take the sit ups, the harder you exhale, the more energy you will have for your next posture.

Monday, January 12, 2015

Tip of the Week: Breathe Fresh Air!


With the air quality in our city being so poor lately, have you wondered why you actually find it easier to breathe in the studio? This is because our studio at Bikram Yoga SLC has a specialized fresh air and heating system that is the perfect marriage between fresh air, heat, and humidity. We have developed a state-of-the-art fresh air system that pumps fresh air along with consistent heat and humidity. We have made every effort to care for the health of our yogis by ensuring that the air quality in the studio is well oxygenated, properly humidified and disinfected from harmful germs.

At Bikram Yoga SLC the room is always being pumped with fresh oxygenated air! We knew there had to be a better system than simply closing the doors and turning up the heat. We've gone through great lengths to maintain the air quality in our studio within a healthy range.  Our fresh air system pulls air from the outside, and goes through a large complex filtration system, eliminating all airborne bacteria. This fresh air is pumped through the system along with consistent heat and humidity. The result is fresh air that doesn’t smell and is not full of harmful bacteria. 

Ever wonder why Bikram Yoga SLC does not smell badly?  We have spent the time, energy and expense to make sure that our classes never smell and that you are breathing the freshest cleanest air possible. Our clean air system will greatly reduce CO2 levels and eliminate and destroy: bacteria, odor, mold & mildew, viruses, V.O.C.’s, cleaning chemicals, smog and other airborne pollution. 

The benefits of a clean air environment are enormous. Clean air will help prevent colds and influenza, prevent headaches after class, provide relief from asthma, hay fever and sinus problems, reduce fatigue, and breathing problems, and relieve sore throats, runny noses, wheezing and sneezing. Practicing yoga at Bikram Yoga SLC will  have a dramatic effect upon your physical and mental well being.

Where is the coolest spot in the room? Unlike other studios that are thermostat controlled where there are hotter and cooler spots, our studio does not have this problem. Due to our system, there is a consistent temperature of 105 degrees and 40% humidity every minute of class, regardless of the number of people in the room or how hard they are working. Instead of a thermostat that just switches on or off, we use sensors in the room that can sense accurately the temperature and humidity in the room, and give instant results. Everything works on a bell curve, to instantly increase or decrease fresh air flow, heat and humidity depending on class size. The speed of the motors is always changing during class.

All is computer controlled with accuracy down to the hundredths. All of the variables are computerized with a software program written specially for us so we can monitor our system and see that the temperature, humidity, and fresh air is always consistent. We can see that as the students are emitting more heat and breathing harder in the cardiovascular series, such as Standing Head to Knee Pose, the motors of the system begin to speed up to pump in more fresh air and remove the bad air. At the same time, the heat in the room is being decreased. The system knows what's happening in your body before your body can even sense it. The CO2 levels are kept to a minimum, and you are able to breathe easily.

So the next time you're in class and you hear the teacher say, "inhale"...you can really "INHALE"! You will be oxygenating and energizing the cells in your body with very fresh, healthy air.

Monday, January 5, 2015

Tip of the Week: Toe Stand Tips

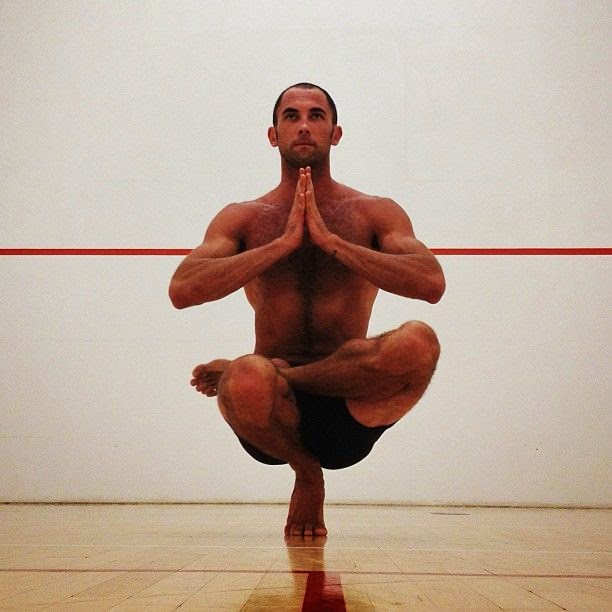
We previously discussed Toe Stand a bit in a blog post you can find by clicking "here", but today we're going to give you a few more tips and modifications.


Modifications & Variations

Practicing Toe Stand Pose can be a great way to gain leg and abdominal strength, while challenging your concentration and poise. Try these simple changes to adapt the pose to your current abilities.
  • Only bring your foot up as far as you can without causing pain. If you’re unable to rest your foot on your hip, place it on your standing-leg thigh, instead.
  • If you’re having trouble coming down to the floor while balancing, practice the pose while holding onto the ballet barre at the back of the room for extra support.

Tips:

To gain all of the benefits of Toe Stand Pose, try to keep your mind calm while maintaining correct alignment. Here are some tips to help you in the pose:
  • Take it slowly. As with all balancing poses, it’s easier to enter the pose slowly and with awareness. If you come into the pose too quickly, you’re more likely to lose your balance — and it’s more difficult to regain your balance once it’s been lost.
  • Keep your spine long throughout the pose, extending through the crown of your head. Imagine that you’re trying to touch the ceiling with your skull. It's a common mistake to want to round your spine.
  • Try to keep your knees on the same plane, with your hips level.
  • To help with balancing, keep your standing foot as close to the central line of your body as possible.
  • Practicing Toe Stand Pose will open your hips, but tighter hips will make it more difficult to achieve the pose. Add extra hip-opening poses into your practice to help with your flexibility in this pose.

Monday, December 22, 2014

Tip of the Week: Stretch Your Toes to Keep Them Strong

Your toes play an important part in maintaining your balance. Stretching your toes can reduce your risk of injury by increasing the overall flexibility of your toes and the arch of your feet. Here are some great tips for stretching your toes at home. Keeping them strong will help you with all of your balancing postures, and maybe even help you come up higher on your toes for the second part of Awkward Pose.


Simple Toe Fan Stretch

Sit on a chair or on the floor, or lie in bed for the easiest of all toe stretches. Use the muscles of your feet to fan out your toes as far as you can get them apart. Once your toes reach their max separation, hold the stretch for five seconds and then relax for five seconds. Repeat this stretch 10 times. It's easier to stretch warm muscles, so perform this stretch after a warm shower to enhance the stretching potential. 


Toe Tops Chair Stretch


Sit on a chair with your feet flat on the ground. If it's a simple four-legged chair or computer chair, keep the back of your thighs pressed on the seat of the chair as you further bend your knees to move your ankles under your chair and place the tops of your toes on the ground. Tuck your toes under your foot so your toenails are firmly against the floor. Push the top of your foot into the floor until you feel a painless stretch. Use your leg muscles to advance or pull back on the stretch. Hold this stretch for 30 seconds. If you're sitting on a couch, rest the ankle of your right foot on top of your left knee. Place your fingers over the top of your toes and pull your toes toward your heel.

Seated Toe-Foot-Calf Stretch

To perform this stretch, sit on the floor while holding a  towel with one end in each hand. With your knees bent, place the middle of the towel under the ball of your right foot. Extend your right leg while keeping your left knee bent with your foot flat on the ground. Pull the towel toward your body until you feel a painless stretch; hold the stretch for 30 seconds. Repeat the stretch with your left foot. This stretch also benefits your calf muscles. Stretching your calves reduces concentrated forces to your feet, according to comfort shoe specialists.

Rubber Band Stretch

While sitting on the floor or in a chair, place one thick rubber band around both of your big toes. The thick rubber band used in the produce department of your grocery store for asparagus is perfect for this stretch. Slowly pull your feet apart as your big toes stretch because of the resistance from the band. Hold the stretch for five seconds and repeat 10 times.

Toe Lunge Stretch

Start this stretch by standing with your feet together. Step forward about 2 feet with your right foot and lower your left knee so it touches the ground. The cushions of your left toes stay on the floor under your buttocks while arching your foot, so you're sitting on the heel of your left foot. Place your hands on the floor to the sides of your body to help maintain your balance during the stretch. Lean your body forward against the upper thigh of your right leg, so your chin is aligned with your right knee. Your right foot is flat on the ground. As you feel the stretch in your left toes, hold the position for 30 seconds and then switch feet.

information by Melissa McNamara, eHow contributor

Simple Toe Fan Stretch

  • Sit on a chair or on the floor, or lie in bed for the easiest of all toe stretches. Use the muscles of your feet to fan out your toes as far as you can get them apart. Once your toes reach their max separation, hold the stretch for five seconds and then relax for five seconds. Repeat this stretch 10 times. It's easier to stretch warm muscles, so perform this stretch after a warm shower to enhance the stretching potential.


Read more : http://www.ehow.com/info_12271744_stretch-toes.html
it doesn't matter if you're a ballerina or a factory worker, your toes play an important part in maintaining your balance. Even with this important function, toes are often neglected during stretching routines and abused by uncomfortable footwear. Stretching your toes can reduce your risk of injury by increasing the overall flexibility of your toes and the arch of your feet. All of these toe stretches are performed barefoot. Before stretching, consult with your doctor, especially if you have a pre-existing foot injury.

Read more : http://www.ehow.com/info_12271744_stretch-toes.html

Monday, December 15, 2014

Tip of the Week: Class Etiquette


This is a nice review, especially since we have so many new students to our studio! 

BEFORE CLASS:


  • Sign in for each class at the front desk.
  • Remove and put your shoes in the lobby area. No shoes are permitted in the changing rooms or practice room.
  • Arrive at least 10 minutes before class begins to get set up in the yoga room (New students arrive 15 minutes early).
  • Please bring only towel, mat, and water into the yoga room (no cell phones).
  • Avoid wearing perfume, scented lotions, and excess jewelry or watches.
  • Enter the yoga room silently. Practice and observe silence in the yoga room as students may be meditating.
  • Make sure you can see yourself in the mirror, but also be sure the people behind you can see themselves as well. 

DURING CLASS:

  • Refrain from talking in class. Practice and observe silence in the yoga room. If you have questions for the teacher, please ask before or after class in the lobby.
  • Practice in the front row only when you feel you are ready to be a role model to those behind you.
  • Do your best to stay in the room once class begins. If you must leave, please let the teacher know and return between postures.
  • Focus on yourself in the mirror.
  • Practice stillness in between postures.
  • Listen to your body and take a break if you need to.
  • Try to refrain from drinking water until "Party Time" right after Eagle Pose. This will allow your body to warm up properly. After that, take small sips of water as needed but only in between postures so you won't distract those around you who may be in a posture.
  • Refrain from using hand towels to wipe sweat from your body during class. Your body cools naturally through perspiration.
  • Wait until the final savasana to use your cold hand towel that is passed out at the end of class. 
  • Have fun...and remember this is your practice.

AFTER CLASS:

  • Practice and observe silence after the final savasana. This is your time for meditation. Try to relax for at least 2 minutes.
  • Use a mop located at the back of the yoga room to clean up any sweat or water from your water bottle.
  • Leave the yoga room quietly by walking softly, rolling your mat carefully, and shutting the door gently.
  • Leave your cold hand towel in the purple bucket just outside the yoga room door. 
  • Bring rented towels and mats back to the front desk when you are finished with them.
  • Please be mindful of the time. Be aware of students coming in for the next class who might need your space if the class is full.
  • Take all of your items home with you (clothing, mat, towels, water bottles).
  • Thank your teacher before you leave, and feel free to ask any questions you might have.
  • Enjoy the peace and energy you have within you. Come back tomorrow!

Tuesday, December 9, 2014

Tip of the Week: More Great Back Bending Tips

Bikram Yoga SLC student Lori Stromness

So many great tips from Tomasz Goetel at Yoga Evolution Studio on back bending that we just had to share! You can find his blog by clicking "here". 

I hear often from students who practice Bikram yoga that their back hurts after class! That’s not very good news! I would recommend you look at the standing back-bend in detail, there may lie the cause.

First and most important: LIFT UP through the chest toward the ceiling to support your sacrum – make sure you don’t “crunch” into your lower back.

Secondly: proceed SLOWLY when coming in!

Ground the feet into the floor, engage your inner thigh muscles, contract the buttocks together, mula bandha active.
Lift your ‘heart up’, relax your neck, and let your head fall back. There should be a space at the back of the neck.
Keep your arms straight, look back (not up), and reach back.

Go slowly at first. Then, increase the intensity. Give yourself a tangible goal, each time you exhale – lift the rib cage up and reach back through the arms one inch, repeat with each exhaling breath. Hips press slightly forward, it is good to shift the weight back to heels, toes can lift off the mat. Legs must be straight at the knees. Inhale to come back to standing straight.

Beginners


If you have a sensitive neck, it is okay to keep your head between the arms (ears and arms together). If you have a lower back issue/injury, place the palms of your hands in your lower back and drop your head back only as far as comfortable on your neck/lower back. The way to practice (and teach) this posture is “less at the beginning, more towards the end”. Don’t be frustrated, if you can’t go as far back as the others. The “back-bending” is one of the most advanced parts of Yoga posture practice.
Give yourself plenty of time, there’s no rush.
 
IMPORTANT: We need your pelvis in a neutral position. Tuck in the tailbone, drawing it down toward the back of the heels. Common beginner’s mistake: the tailbone/butt sticks out, then the lower back gets “crunched” and hurts the next day from inflammation!

Beginners tip: if you need to hold your breath in this exercise, that’s okay.

Intermediate


Here’s a GREAT KEY to standing back-bending: “Strong legs, flexible spine.”

Here’s another one: “Work from the feet up.” Ground the feet, engage the inner thighs, contract the gluts. You will eventually shift your weight slightly towards the heels.
The “strong” feeling in the legs and hips is the foundation of this back bend.

We’re lifting up through “the heart”, as we reach back out of the chest through the arms.
Learn to see the back-wall behind you, but instead of dropping back, continue lifting up through the sternum. Then, straighten out the elbows and squeeze you palms together flat.

If you like, hold the position a few seconds longer than the rest of the class, the come back up with control and go straight to Padahastasana with no unnecessary movement.
Intermediate tip: look BACK behind you, not up.

Advanced


“Strong legs, flexible spine.” As you can already see the back wall, begin to relax your lower back. Drop the head even further back and begin to look for the floor behind you. Isolation: inner thighs engaged, gluts (buttocks) engaged AND lower back muscles relaxed!

Once you see the floor behind you – look for the back edge of your yoga mat. The next step is to see your heels, your arms will be pointing down towards the ground behind you.

Advanced considerations: the back-bends explore the heart-chakra and its psychology. Here we approach our capacity to give and receive love. The heart is the Yogi’s “mission control center”. Back-bends explore this area of ourselves and offer a tremendous contribution to our emotional development, and general well-being!

For Teachers


Common teaching mistakes: not giving the students enough time to do this backbend and/or rushing them in/out this pose. In my class, you’d have as much as 30 SECONDS to do this part of half-moon (10 seconds to set up, 20 seconds in the pose).
The most important – offer the following modifications:

  • Head between the arms for sensitive neck.
  • Hands flat on the lower back for back injuries.
  • Careful coming down to Padahastasana after the half-moon: bend the knees, hands on thighs on the way down to protect the lower back.
  • No back-bends in pregnancy. Teach active Mountain Pose instead?
Common Student mistakes:

  • Tailbone sticks out – bad for the lower back.
  • Eyes closed – danger of falling back.
  • Rushing into the pose (this is very common in bikram) – chances of injury, lack of satisfaction.
  • If your Students are getting lower-back pain from class, the first thing we must evaluate is the alignment of their standing back-bend.

Monday, December 1, 2014

Tip of the Week: Stay Healthy During the Holidays


According to a recent Weight Watchers report, the average American gains around 7-10 pounds between Thanksgiving and New Year's Day. This is through pure over-indulgence and gluttony. Moreover, much of this weight is maintained from thereon despite our promises to go on a diet in January.

Food and festivity will always be a major part of the holiday season - and there is certainly nothing wrong in that. However, the holiday season is also a stressful time for many of us, and we need plenty of energy and stamina to cope with it. It is therefore essential that we eat the right type of food with the necessary nutrients to give us energy and reduce stress levels. This is not to say that we shouldn't allow ourselves to indulge a little, but we should eat in moderation and maintain a varied diet.

Here are some tips for enjoying the holidays in a healthy way:

Narrow down your options  
If you attend a gathering that is offering a lot of sugary treats, find one or two of your favorite holiday goodies and enjoy them! After that, call it quits on desserts. 

Eat regularly

If you are going to a big party or dinner, don’t starve yourself all day in anticipation. If you do, you're in danger of arriving there feeling ravenous and eating everything in sight. Instead, consume a balanced breakfast (egg, toast, and fresh fruit) and a reasonable lunch (sandwich and fresh vegetables/fruit) so your blood sugar doesn’t drop and cause even more sugar cravings.


Be assertive

Don't feel as though you have to say yes to everyone that offers you food. If you are not hungry, then simply say so. Peer pressure can influence some of our food choices around the holidays, so be aware.


Prepare for outings

If you have some big meals planned over the holiday season, try to have as many routinely healthy meals as possible leading up to the event. Then when you attend the gathering you can enjoy all the special entrées and treats - within moderation. Many of us think that we might as well forget about healthy eating over the holidays instead of realizing that we shouldn’t forget all about our healthy habits. It’s a time to simply manage them a little more carefully. 


Do a 30 Day Bikram Challenge

Sign up at the studio to a 30 day challenge. Knowing that you're committed to practicing daily will keep you on track with eating routines. And staying focused on your practice will  keep your stress level down, especially during this hectic time of the year.

Monday, November 24, 2014

Tip of the Week: Bikram Helps Your Ski Season

Ski season is finally here! The runs may be ready...but are you?  Keeping your Bikram yoga practice strong by practicing at least a few times a week will increase your strength, balance, coordination and concentration which will inevitably make your ski season all the better.

All of the balancing postures will train your body to recover from shifts in your center of gravity. Handling erratic conditions on the slopes is like dealing with erratic people: You need flexibility and balance to get you through intact. Work on focusing on your form and alignment during your Bikram practice, and you will improve your ability throughout the season.

Below are just some of the many benefits of some of these balancing postures:

Awkward Pose builds strength and endurance in addition to firming all muscles of thighs, calves & hips and makes hip joints flexible. Firms the upper arms. Increases blood circulation in the knees & ankle joints.
 

Eagle Pose helps firm calves, thighs, hips, abdomen, & upper arms. It also improves the flexibility of the hip, knee, and ankle joints.


Standing Head to Knee strengthens the tendons, biceps of the thigh muscles and hamstrings in the legs, in addition to the deltoid, trapezius, latissiumus dorsi, scapula, biceps & triceps.


Standing Bow Pose Firms abdominal wall & upper thighs, & tightens upper arms, hips & buttocks. Increases the size & elasticity of the rib cage & lungs. Improves flexibility & strength of lower spine & most of the body's muscles.


Balancing Stick perfects control & balance.
Firms hips, buttocks, upper thighs. Improves flexibility, strength & muscle tone of shoulders, upper arms, spine & hip joints.


builds strength endurance in the quads and glutes.

Monday, November 17, 2014

Tip of the Week: Don't Hyperextend Your Neck


I have observed many yoga students who hyperextend their necks in poses like Cobra. In the case of backbends, many students have the habit of over-arching from the neck. They compress the backs of their necks, and often arch too much from the back of the skull (the occiput), at the atlas-occipital joint. (The atlas is another name for the first cervical vertebra.) This habit is common in those with tight thoracic spines. When the thoracic spine is stubborn, people sometimes overcompensate by overarching the more flexible cervical and/or the lumbar spines. In other words, when one link in the chain is tight, people tend to move more than they should from the links above and below it.

When instructing backbends, I encourage students to try to keep the back of the neck long. Rather than looking up in a pose like Cobra, I encourage those with the habit of neck hyperextension to keep their gaze forward, which tends to keep them from tipping the head back too much. It’s also useful to think of originating the movement in your neck from the middle of the thoracic spine and the lower cervical vertebrae (where the neck attaches to the back).

In twists, try not to lead with your head. In other words, the turn should come from the vertebrae all along your spine, with no twist whatsoever from the atlas-occipital joint. One instruction I give if students feel any tension in the neck is to turn the head ever so slightly (say 1 millimeter) in the opposite direction of the twist. What this accomplishes is to stop people from trying to twist the skull on C1, a motion those joints are not meant to do. Even more conservative, is to not let the chin turn any more than the chest, in other words the nose and chest point in the same direction. 

Beyond lessening the theoretical risk of a vertebral artery stroke, all the above advice will also tend to help avert yoga’s contributing to such musculoskeletal problems of the neck as arthritis and overstretching of spinal ligaments.

Excerpt from Yoga for Healthy Aging. The entire article can be found by clicking "here".

Monday, November 10, 2014

Tip of the Week: Confront Yourself


Look at your own eyes in the mirror. 


We hear this every time we take class, but why is it so important? There’s quite a bit going on by following this part of the dialogue, and it all boils down to confronting. Now this is not referring to the common definitions of confronting, which involve adversarial confrontation, or meeting face to face with someone or something, but rather some lessor known definitions of the word “confront.” 

Here are two that I dug up which are applicable to Bikram yoga. “To bring together for examination or comparison”.
 
This one is fairly obvious, and you could look at it a number of ways. We are all coming together in the room, or your mind, body and soul are coming together for examination or comparison. Pretty interesting way to look it. As we progress in our practice, we constantly exam or compare how we are doing to previous classes and only be confronting can we truly make meaningful improvements or changes. If you never saw how your postures look in the mirror, you wouldn’t have a very clear idea how to improve them.


“Face without flinching or avoiding.”
 

I like this definition, because it’s exactly what we’re doing in the room. In life, we all have situations we avoid or draw back from, whether it’s your own body or another person, a job situation, credit card bills, whatever. In the hot room, we confront ourselves without flinching or avoiding, or at least that’s what we are striving to do. 

I had various physical problems before I started doing Bikram, long since handled. I was able to address them because I would go in the room everyday and face myself in the mirror. By confronting myself, I was able to handle these problems, and it became very simple. For years I had simply avoided things and didn’t confront, and this made everything very complicated. Only by confronting myself, did things get simple and finally resolve.

By Bikram Infinity